
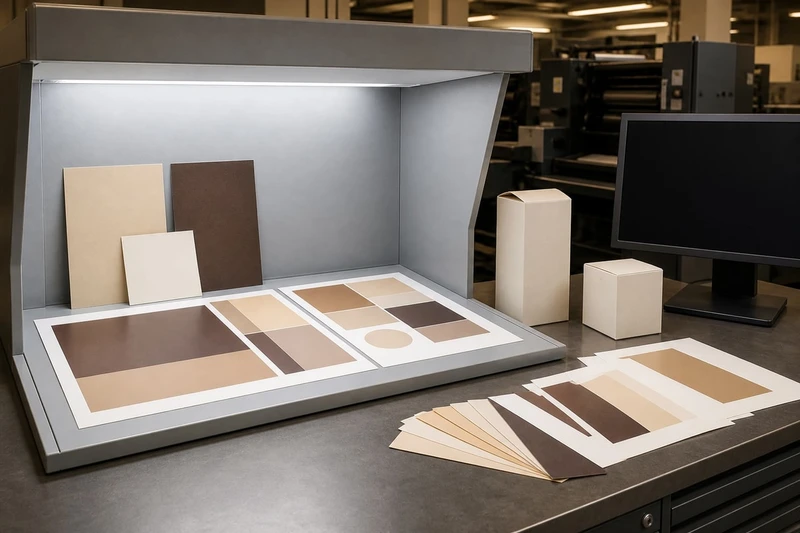
Packaging colour proofing is the process of agreeing on what your printed packaging should look like before the full production run begins. A good proof does not promise that every carton will be an exact visual match in every setting. Instead, it creates a clear, achievable colour target based on the artwork, printing method, material, finish and viewing conditions.
For custom boxes, labels and gift packaging, the most reliable approach is to define the intended colour reference early, review a relevant physical sample where possible, and record exactly what has been approved. This avoids a common issue: approving colour from a bright computer screen, then finding the printed packaging looks different on uncoated board, metallic foil or under shop lighting.
Define the colour reference before approving artwork
A colour reference tells everyone involved what “correct” means. Without one, a brand colour may be interpreted from a screen image, an old box, a Pantone book, a PDF or a verbal description. These references can produce noticeably different outcomes.
Start by identifying the primary reference for each important colour. The right reference depends on the role of the colour and the print method.
Common colour references for packaging
- Pantone spot colour: A named Pantone colour selected from the appropriate printed guide. It is often useful for a logo, signature brand colour or a solid area requiring repeatability.
- CMYK build: A percentage mix of cyan, magenta, yellow and black, such as C: 100 M: 50 Y: 0 K: 0. This is normally used for full-colour imagery and artwork printed in process colour.
- Approved physical sample: A previously printed carton, sleeve, label or pack retained as the benchmark. This can be useful, provided its age, substrate and finish are known.
- Brand colour specification: A documented standard that may include Pantone references, CMYK values, RGB values and usage rules. For print approval, the Pantone or CMYK instructions are usually more relevant than RGB.
- Digital artwork only: This is necessary for production, but it is not a complete colour reference on its own. The appearance of a PDF depends on its colour settings, the display and how the file is printed.
For critical colours, document more than a colour name. Include:
- The spot colour name or CMYK values.
- Whether it is to print as a spot ink or process colour.
- The intended substrate, such as white coated board, natural kraft board or clear label film.
- The finish, such as matte lamination, gloss lamination, aqueous coating or no coating.
- The item being approved: press proof, printed sample, drawdown or production sample.
- The acceptable viewing conditions.
This gives a packaging supplier, designer and procurement team a shared basis for decisions.
Use RGB and hex values carefully
RGB and hex values are designed for light-emitting screens. They can help preserve brand consistency across digital channels, but they do not specify a printable colour by themselves. A vivid screen blue, green or orange may fall outside the printable gamut of CMYK inks, especially on uncoated materials.
If the artwork contains only RGB or hex values, ask for conversion to an appropriate print colour space before proofing. Where the exact visual character of a brand colour matters, a named spot colour may be a more dependable starting point than a CMYK conversion.
Understand screen proof and physical proof limits
A proof is a decision-making tool, not a generic guarantee. Its value depends on how closely it represents the final packaging specification.
Screen proofs, desktop printouts, calibrated contract proofs and press-produced samples all serve different purposes. Knowing the limit of each one helps you request the right proof at the right stage.
| Proof type | Best used for | What it can show | Key limitation |
|---|---|---|---|
| Screen proof | Checking layout, text, image placement and general colour direction | Artwork content and approximate visual balance | Screen brightness, colour settings and ambient light vary |
| Office or desktop printout | Reviewing copy, size and rough layout | Basic page content and position | It rarely matches commercial inks, board or finishes |
| Contract-style digital proof | Assessing expected CMYK reproduction on paper | More controlled process-colour appearance | It may not use the actual packaging board or production press |
| Physical mock-up or sample | Assessing material, structure, finish and overall appearance | How artwork behaves on a comparable substrate | It may differ from final production if print process or materials differ |
| Press proof or production sample | Reviewing the closest available representation of final print | Ink, substrate and press interaction | It may involve extra cost, setup or lead time, depending on the job |
What a screen proof is good for
A PDF or online proof is essential for catching content errors before printing. Review it carefully for:
- spelling, punctuation and legal copy;
- barcode position and readable quiet zones;
- dieline alignment;
- panel order on cartons and sleeves;
- image placement and crop;
- white ink, foil, embossing or varnish layers;
- overprint settings and knockout areas;
- version control.
It is also useful for identifying obviously incorrect colour choices. However, do not approve a screen proof as a precise colour match unless the display is professionally calibrated and the approval conditions have been agreed in advance.
Most consumer and office displays are intentionally bright. They may make colours appear more saturated and shadows more open than they will appear on printed packaging. A screen also creates colour with light, while ink on packaging reflects light. That fundamental difference is why a bright digital preview cannot fully predict a printed carton.
When to request a physical proof
A physical proof is most valuable when the packaging includes one or more of the following:
- a tightly controlled logo colour;
- a large solid colour field;
- pale neutrals, greys, creams or pastel shades;
- brand colours printed on uncoated, coloured or recycled-looking materials;
- metallic foil, holographic film or metallic board;
- clear, frosted or coloured labels;
- white ink beneath CMYK artwork;
- multiple finishes on the same pack;
- a relaunch where new packaging must sit beside existing stock.
For a straightforward CMYK carton with non-critical imagery, a controlled digital proof and clear production specifications may be sufficient. For a premium gift box or a product line where shelf consistency matters, a physical sample generally reduces uncertainty.
If you are developing custom printed boxes, ask whether the proposed proof uses the same or a closely comparable board, ink system and surface finish as the production item. “Physical proof” can mean different things, so the construction and print process should be confirmed rather than assumed.
Account for paper, board and finish effects
The same ink values can look different on different packaging materials. This is not necessarily a printing fault; it is the result of light interacting with the ink, surface and underlying material.
A CMYK colour that looks clean and vivid on smooth white coated board may appear softer or warmer on uncoated board. A transparent ink printed over metallic material may take on a reflective, shifting character. Matte lamination can reduce surface glare, while gloss can make dark colours look deeper and more saturated from some viewing angles.
Substrate changes the starting point
The base material is part of the final colour. Consider these typical effects:
- Bright white coated board: Usually supports sharp detail, clean highlights and stronger-looking process colours.
- Uncoated board: Often produces a more natural, muted appearance because the surface absorbs more ink.
- Kraft or brown board: Adds a brown base tone that affects every transparent printed colour. White ink may be needed where a clean, bright result is required.
- Recycled or textured stocks: Can have visible fibres, natural tonal variation or a less even surface. These characteristics may be desirable, but they should be allowed for in colour expectations.
- Coloured substrates: The board colour becomes part of the print result unless an opaque white layer is printed beneath the artwork.
- Clear film: Colours can look different depending on the product behind the label or package. A white underprint can change both opacity and colour appearance.
Ask to approve colour on the actual material wherever practical, especially if your visual identity relies on a subtle white, light grey, blush pink, beige or deep black. Small shifts are more noticeable in these colours than in detailed photographic artwork.
Finishes alter perceived colour
Finishing is not only a tactile or decorative choice. It can alter perceived density, contrast and reflectivity.
- Gloss lamination can make colours appear richer but may introduce reflections that obscure details in bright retail lighting.
- Matte lamination can give a softer, lower-glare result; some dark areas may look less intense than on gloss.
- Soft-touch finishes can create a distinctive tactile effect, though they may change perceived darkness and need assessment on a finished sample.
- Spot UV varnish creates a contrast between glossy and non-glossy regions rather than a colour change alone, but the contrast can make nearby colours appear different.
- Foil stamping is reflective and viewing-angle dependent. Its visual result is not equivalent to metallic ink shown on a monitor.
- Embossing and debossing create shadows and highlights which affect how artwork is perceived under directional light.
For gift packaging, assess all elements together: board colour, foil, lamination, ribbon or inserts, and the product’s display environment. Approving foil only from a digital mock-up is particularly risky because screens cannot reproduce its reflective behaviour.
Consider production variation realistically
Commercial printing involves normal variation. Ink density, board characteristics, humidity, drying, press setup and finishing can all cause small changes between samples or production batches. The practical aim is repeatable colour within an agreed tolerance, not an impossible identical appearance under all conditions.
A sensible approval process focuses attention on the colours that customers will notice most: the logo, key brand panel, skin tones, product image, legal text contrast and barcode readability. It should also identify areas where minor variation is acceptable, such as photographic backgrounds or non-brand decorative gradients.
Compare spot and process colour decisions
The choice between spot colour and CMYK process colour affects cost, artwork setup, proofing and colour consistency. Neither method is universally better; the suitable choice depends on the design and production requirements.
Spot colours
A spot colour is a premixed ink specified by a named system, commonly Pantone. It is printed as its own ink rather than being built from CMYK dots.
Spot colours are often appropriate for:
- a logo that must maintain a particular character across packaging formats;
- a large, flat brand colour;
- colours difficult to reproduce accurately with CMYK, such as some bright oranges, greens or blues;
- packaging with a limited number of colours;
- designs that need an opaque white ink on coloured, clear or metallic material.
Advantages include a direct reference and potentially more stable solid-colour reproduction. However, the printed result is still influenced by the chosen substrate, coating and print method. A Pantone selection viewed in a guide for coated paper may not look the same on uncoated board or on a laminated surface.
CMYK process colour
CMYK creates colours by printing small dots of cyan, magenta, yellow and black in combination. It is the usual option for photographs, complex illustrations and designs containing many colours.
CMYK is often appropriate for:
- product photography;
- multi-colour artwork;
- gradients and tonal illustrations;
- packaging where the brand colour can be acceptably matched using process inks;
- variable designs that share a standard full-colour setup.
CMYK offers flexibility, but it has a limited gamut. Some colours visible on screen or available as spot inks cannot be reproduced exactly in standard process printing. A branded bright red, electric blue or fluorescent-looking green may need adjustment to reach the closest printable CMYK equivalent.
Quick decision guide
| Requirement | Usually worth considering |
|---|---|
| Full-colour product photography | CMYK process colour |
| Large, highly visible logo colour | Spot colour, if production method supports it |
| Small logo within photographic artwork | CMYK may be adequate after proofing |
| White design on kraft, clear or metallic material | Opaque white ink, with suitable artwork layers |
| Metallic visual effect | Foil, metallic substrate or metallic ink, each with different proofing needs |
| Several product variants with colour photography | CMYK, potentially with a spot colour for the master brand element |
| Strict match to an existing printed pack | A physical approved reference and a suitable spot/process decision |
Do not assume a Pantone colour will always print as a separate spot ink. Sometimes a Pantone reference is used only as a target for a CMYK conversion. Confirm which approach applies in the production specification.
Review samples under consistent lighting
Lighting can make a correct print look wrong—or make a questionable match appear acceptable. The issue is especially common with white, grey, cream, navy, black and metallic finishes.
For a reliable review, compare samples under controlled, neutral lighting. In professional colour evaluation, D50 lighting is commonly used because it provides a standard daylight-like condition for assessing printed colour. If you do not have access to a controlled viewing booth, use consistent natural daylight away from direct sun and avoid judging samples beneath strongly coloured household or warehouse lighting.
A practical colour review routine
- Use one agreed viewing environment. Review the proof and reference together, not in separate rooms or on different days if avoidable.
- Place samples on a neutral background. Bright desks, timber tables and coloured walls can influence how colours appear.
- View at a normal reading distance first. This reflects how customers are likely to experience the packaging.
- Then inspect important details closely. Check small type, reverse-out text, barcode contrast, image detail and registration.
- Turn the sample slightly for reflective finishes. Foil, gloss varnish and metallic board should be checked from more than one angle.
- Check likely retail conditions as a secondary step. For example, review under typical warm interior lighting if the pack will commonly be displayed in that environment.
- Avoid comparing aged samples with new proofs without noting their condition. Old packs may have faded, yellowed or been scuffed.
It is helpful to nominate one or two decision-makers for colour approval. Too many independent reviewers often produces conflicting preferences, particularly when they view samples under different lighting.
Record an achievable approved reference
Once colour has been approved, record the decision in a form that can be used for reorders and future packaging updates. A vague email such as “colour looks good” is not enough when multiple materials, print methods or versions are involved.
Your approval record should identify the approved reference and the conditions under which it applies.
What to include in an approval record
- job name, SKU or packaging version;
- artwork file name, revision number and approval date;
- dieline version;
- print method where known;
- substrate description and colour;
- finish and special processes, including foil, white ink and varnish;
- spot colour names and/or final CMYK values;
- proof type reviewed;
- photos for identification only, not as the sole colour standard;
- a retained, signed physical sample where appropriate;
- any known acceptable exceptions or priorities.
For example, a useful instruction might state:
Approve the physical sample dated 14 May as the colour reference for the navy logo and cream background on white coated board with matte lamination. Minor variation in the photographic background is acceptable. Metallic foil is to be assessed by appearance under neutral lighting, not against on-screen artwork.
This is more actionable than requesting an “exact match”. It names the critical elements, the material and finish, and recognises that different print features have different visual behaviour.
Keep a production reference sample
Retain an approved physical sample in clean, dry storage and label it clearly. For recurring packaging, this is often the most practical reference for comparing future runs. Keep in mind that a sample can age, fade or become marked, so record when it was approved and replace the master reference when packaging specifications change.
If an existing pack is the benchmark, confirm whether it was produced on the same material and with the same finish. Matching a gloss-coated white carton to an uncoated sleeve, for instance, may require a compromise even when the artwork values are identical.
Common packaging colour proofing mistakes
Avoidable proofing mistakes often come from treating colour as an artwork-only issue rather than a combined production decision.
- Approving from a phone or laptop screen alone. Displays vary too much for precise colour approval.
- Sending RGB artwork without print conversion. Bright screen colours may not be printable as expected.
- Using a Pantone code without naming the guide or substrate context. Coated and uncoated references can differ.
- Ignoring the effect of lamination or foil. Finishing should be included in the sample review where colour appearance matters.
- Comparing samples under mixed lighting. Daylight, LED and warm retail lights can produce different impressions.
- Approving a mock-up as though it were a press proof. A structural sample may not represent final ink reproduction.
- Changing board or finish after approval. Even a seemingly minor stock change can alter colour.
- Not identifying the most critical colours. Teams can waste time debating low-impact variation while missing a logo mismatch.
- Failing to retain the approved sample and documentation. Reorders become harder to manage when the benchmark is lost.
FAQs about packaging colour proofing
Can a printer guarantee an exact Pantone match on every packaging material?
Not in every circumstance. A Pantone reference gives a valuable target, but the final appearance depends on the substrate, ink, coating, print process and lighting. A colour may need a different formulation, an opaque base layer or a revised expectation on uncoated, coloured, clear or metallic materials.
Is a digital proof enough for custom packaging?
It is often enough to approve layout, content and general artwork direction. It is less reliable for critical colour, texture, foil, lamination and the effect of a specific board. Consider a physical proof when those features are important to the buying decision.
Why does my packaging look darker after matte lamination?
Matte lamination changes surface reflection and can affect perceived contrast and depth, particularly in dark solid areas. Review a finished sample rather than judging unlaminated printed sheets if matte lamination is part of the final specification.
Should labels and boxes use the same colour reference?
Yes, but expect the same ink specification to appear different on different materials. A paper label, clear film label and folding carton have different surfaces and bases. For branded colour consistency across formats, approve each substrate or establish a separate approved target for each one. This is particularly relevant when specifying custom printed stickers and labels.
Make colour approval part of the packaging specification
Packaging colour proofing works best when it is planned before production rather than used to fix uncertainty at the end. Define the colour reference, select spot or process colours deliberately, proof on relevant materials, review under consistent lighting and retain a clear approved sample.
Before placing a packaging order, prepare your artwork files, material and finish choices, priority colours, and approval record. Share those details with your packaging supplier so the proofing method can be matched to the level of colour control your product requires.
