
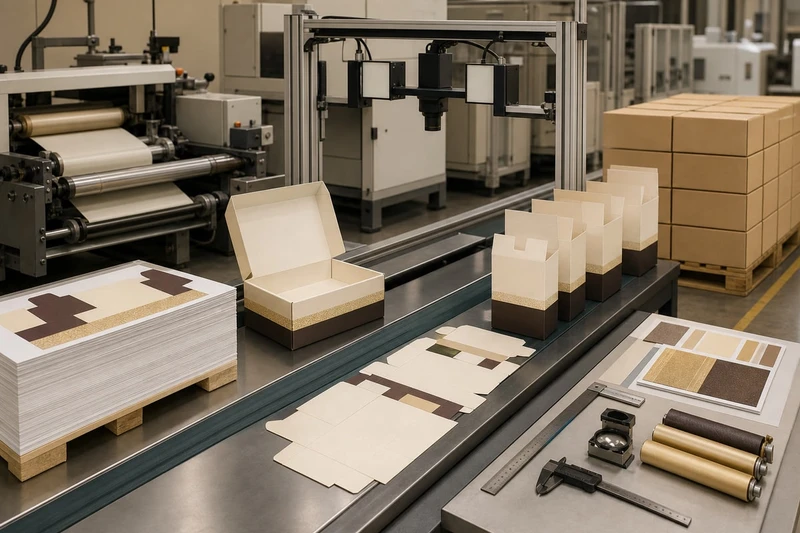
Packaging quality control checkpoints are the planned inspection and approval points that keep a packaging job aligned with its agreed sample, artwork, materials and packing requirements. The strongest approach is reference-led: decide what “acceptable” looks like before production, inspect at the stages where problems can still be corrected, and record any decisions that change the original brief.
For custom cartons, labels, gift boxes and e-commerce packaging, quality control is not one final inspection at dispatch. It is a sequence of checks covering substrates, colour, finishing, dielines, assembly, pack-out and documentation. The criteria should reflect the product, intended use, sales channel and agreed specifications rather than assumed universal tolerances.
Approve materials and production references
Quality control starts before the press runs or a die cuts the first sheet. A production team needs a clear, controlled reference set so that purchasing, printing, finishing and inspection are working to the same version of the job.
At minimum, the reference set should identify:
- Approved artwork files and their revision number
- Structural design, dieline and finished dimensions
- Material type, grade, colour and surface characteristics
- Print method and agreed colour references
- Coatings, laminations, foils, embossing or other finishes
- Glue areas, folds, locking features and assembly requirements
- Barcode, QR code or variable-data requirements where applicable
- Pack quantity, orientation, labelling and shipping carton instructions
- The acceptance criteria for visible defects and functional performance
For branded packaging, the approved reference may include a physical sample, a previously signed-off production sample, a colour target or a digital proof. Each has a different purpose. A digital proof is useful for checking content, placement and layout. It does not necessarily show how ink, foil, varnish, texture or board colour will appear on the final substrate. A physical production reference is generally more useful where colour appearance and finishing are important.
Material checks to make before production
Material approval should be more than confirming the stock name. The team should check whether the selected substrate suits the packaging’s actual function.
For example:
- A folding carton needs board stiffness appropriate to its size, design and contents.
- A mailer needs sufficient strength for its intended distribution journey and closure style.
- A cosmetic or premium gift box may need a clean, consistent surface for foil, embossing or detailed artwork.
- A food-adjacent pack may have specific material, ink or barrier requirements that should be defined by the buyer and confirmed with the relevant supplier.
- A label stock must work with the application surface, storage conditions and intended adhesive performance.
Material can vary naturally between batches, particularly in shade, grain, texture and surface response. This is why the approved substrate and its visual expectations should be noted before printing. If an alternative material is proposed due to availability or performance, it should be reviewed as a change—not treated as automatically equivalent.
Build a practical control plan
A packaging control plan maps each critical requirement to a checkpoint, a reference, a person responsible and an action if the result is outside the agreed criteria.
| Control area | What to define | Useful reference | Typical checkpoint |
|---|---|---|---|
| Artwork | Version, copy, legal text, graphics and codes | Approved artwork PDF or native file | Pre-production |
| Structure | Dieline, dimensions, folds and closure | Approved dieline and structural sample | Pre-production and first-off |
| Material | Substrate, colour, thickness or grade, surface | Material specification and approved sample | Goods-in and make-ready |
| Colours, registration and legibility | Colour target, signed proof or sample | First-off and during run | |
| Finishing | Lamination, varnish, foil, embossing or die-cut detail | Approved finished reference | First-off and finishing |
| Assembly | Glue, folds, fit and pack function | Constructed sample | Assembly checks |
| Pack-out | Quantity, orientation, carton marks and protection | Packing instructions | Final release |
The point is not to turn every job into a lengthy bureaucracy. It is to ensure that the features most important to the product are visible in the plan. A simple single-colour shipping carton needs different controls from a retail presentation box with metallic foil and close colour matching.
Review first-off output
The first-off, sometimes called the first production sample, is the first meaningful opportunity to compare actual output with the approved references. It should be reviewed before the full job continues wherever the production method and workflow allow.
A first-off review helps catch errors that are costly to discover later, including wrong artwork versions, incorrect board orientation, colour shifts, registration issues, poorly positioned foil, unsuitable creases or an assembly problem.
What to check on a first-off sample
Review the sample in normal viewing conditions and, where relevant, under the lighting in which customers will see the packaging. Compare it against the relevant reference rather than relying on memory.
Check the following:
- Content accuracy
Confirm product names, variants, ingredients or claims supplied by the brand, addresses, symbols, promotional details and mandatory text are the approved versions. A quality inspection can verify that the printed copy matches the supplied approved artwork, but it cannot decide whether the supplied legal or regulatory content is correct.
- Artwork placement and orientation
Check front, back, side panels, inside printing and panel sequence. Confirm that graphics, copy and codes sit in the intended positions after cutting and folding.
- Colour and image appearance
Compare key brand colours, photographs, tints and black text with the agreed target. Specify beforehand which colours are critical and whether a physical colour reference is required. Colour can look different across substrates, coatings and viewing conditions.
- Registration and fine detail
Inspect small type, reversed text, line work, trapping and alignment of multiple colours. Fine elements that look acceptable on a flat sheet can become less clear after coating, laminating or scoring.
- Structural accuracy
Fold and assemble the sample. Check that creases are in the right place, tabs engage as intended, panels align and the product fits as specified.
- Scannable or variable elements
Where barcodes, QR codes, serial information or batch areas are part of the pack, inspect their placement and confirm the agreed verification method. The buyer should state any applicable scanning or data requirements early in the brief.
First-off approval should be explicit
Avoid vague comments such as “looks fine” or “close enough”. A useful approval decision records:
- The job and artwork revision reviewed
- The sample or sheet identifier
- Any approved deviations from the original reference
- Any corrective action required before proceeding
- Who made the decision and when
If the sample differs from the agreed reference, there are three sensible outcomes: correct it, approve a documented variation, or stop and resolve the issue. Continuing without a documented decision creates avoidable disagreement at final inspection.
Check print finishing and converting stages
Many packaging faults are introduced after printing. A carton may have accurate artwork on the press sheet but fail after die-cutting, creasing, laminating, foiling, window patching, gluing or packing. Process-stage checks are therefore as important as press checks.
The controls needed depend on the pack format. Custom packaging boxes may combine several processes, so the key is to identify which features are cosmetic, functional or both.
Print checks during the run
During printing, inspect samples at planned intervals and after meaningful changes such as make-ready adjustments, a material change or a restart. The exact sampling approach should be agreed for the job; there is no single inspection frequency suitable for every packaging run.
Key print checks include:
- Correct artwork and panel sequence
- Colour appearance against the agreed target
- Registration of colours and cut marks
- Ink coverage, scuffing, set-off or unintended marks
- Sharpness of small text, fine lines and barcodes
- Consistency across the sheet or web where relevant
- Absence of contamination, hickeys, streaks, ghosting or other visible print faults
When colour is particularly sensitive, define the evaluation method in advance. For some projects, visual comparison with an approved physical sample may be adequate. For others, the buyer may require instrument-based measurements and a stated target. Those requirements need to be specified, including the measurement conditions and acceptable variation, rather than assumed after production starts.
Finishing checks need their own reference
Finishes often change the appearance and behaviour of the printed pack. Gloss or matt lamination can alter perceived colour; foil can reveal registration errors; embossing can affect fine type; and a varnish may change friction or scuff resistance.
At the finishing stage, inspect:
- Coating, varnish or lamination coverage and appearance
- Bubbles, lifting, wrinkles, scratches, cracking or edge issues
- Foil position, coverage, adhesion and unwanted transfer
- Embossing or debossing depth, placement and clarity
- Spot effects and their registration to underlying artwork
- Window placement, film adhesion and visible glue
- Surface marks that would be apparent at retail presentation
A finish should be judged against the agreed sample and intended use. For instance, minor variation in a recycled or textured substrate may be part of the selected material character, while a scratch across a high-end gift box front panel may not be acceptable. The acceptance threshold belongs in the job brief.
Converting checks protect function
Converting turns printed material into usable packaging. The critical controls usually include die-cutting, creasing, perforating, trimming and gluing.
Inspect for:
- Cut accuracy and clean edges
- Correct location and quality of creases
- Cracking along folds, especially on printed or heavily coated areas
- Properly formed perforations and tear features
- Correct glue placement, bond and open time where relevant
- No unintended glue marks, blocked panels or adhesion on visible surfaces
- Carton squareness, closure engagement and erectability
- Product fit, including inserts, trays or sleeves where supplied
A functional test should reflect how the pack will be used. A display carton may need to open cleanly and stand upright. An e-commerce mailer may need its closure to remain secure during the expected handling process. A product box may need the contents to sit correctly without excessive movement. Describe the test method and pass condition instead of using general phrases such as “strong enough”.
Inspect assembly and pack-out
Assembly inspection confirms that the converted component becomes the intended pack. It is particularly important for rigid boxes, multi-part gift sets, sleeves, inserts, folded cartons and kits containing multiple printed components.
Assembly inspection checklist
Use an assembled sample, not only a flat blank, to check:
- Correct matching of lids, bases, sleeves, inserts and outer cartons
- Orientation of printed panels and internal components
- Neat wrapping, corner formation and covering material alignment where applicable
- Glue bond and clean glue application
- Consistent fit between lid and base, or between carton and insert
- Ease of opening and closing for the intended user
- Product placement, protection and presentation
- Any included label, leaflet, sticker or seal in its correct position
If the job includes custom printed stickers and labels, confirm their stock, adhesive suitability, artwork version and application position as part of the assembly instruction. A correctly printed label can still fail the finished-pack requirement if it is crooked, applied to the wrong panel or lifts from the packaging surface.
Pack-out is part of quality, not just logistics
A finished carton can be acceptable at the factory bench and still arrive in poor condition if it is packed badly. Pack-out controls should protect the product and make receiving checks easier.
Define and inspect:
- Quantity per inner bundle, shipper carton or pallet unit
- Orientation of packs in the shipping carton
- Dividers, protective layers or wrapping where required
- Shipper carton markings and job identification
- Separation of different variants, languages, artwork versions or batches
- Carton closure and handling instructions where relevant
- Count reconciliation between finished goods and dispatch records
The appropriate shipping configuration depends on the carton structure, finish sensitivity, storage period and distribution method. Avoid copying a packing method from another job without checking whether dimensions, surface finish and product weight are comparable.
Record non-conformance and decisions
A non-conformance is any observed result that does not meet the agreed specification, approved reference or documented instruction. Recording it is not about assigning blame. It creates a traceable basis for containment, correction and release decisions.
A useful non-conformance record states:
- Job number, product description and relevant batch or production identifier
- Date, stage and quantity affected or potentially affected
- Clear description of the issue
- Photos or retained samples where useful
- Reference requirement that was not met
- Immediate containment action, such as holding affected stock
- Investigation or likely cause, if determined
- Disposition: rework, sort, accept by concession, replace or reject
- Approval for the chosen disposition
Separate defects from agreed variations
Not every difference is automatically a defect. A buyer may approve a revised material, minor artwork correction or changed packing method before or during production. That is a controlled variation if it is recorded and approved by the appropriate person.
Conversely, an undocumented verbal instruction can cause problems. If someone approves a change over the phone or email, update the job record so the production and inspection teams have one clear source of truth.
Decide who can accept a concession
A concession is a decision to accept a known departure from the original criteria. It should not be made casually by someone without authority to accept the commercial or brand impact.
Before accepting a concession, consider:
- Is the difference visible to a customer?
- Does it affect legibility, scanning, product protection or usability?
- Is it consistent across all affected units or isolated?
- Can the affected stock be separated and identified?
- Does it create any issue for the intended retail, e-commerce or promotional use?
- Does the buyer need to review a physical sample before deciding?
A concession should be specific to the identified condition and quantity. It should not become an assumed standard for future orders unless the specification is formally changed.
Release finished cartons against agreed criteria
Final release is the decision that finished cartons are ready for dispatch because they meet the agreed criteria, or because any exceptions have been formally resolved. It should combine production records with a final physical check—not rely on either one alone.
The final inspection plan should be appropriate to the job’s risks and value. A small run of premium presentation boxes may justify checking every unit or a high proportion of units. A large run of straightforward cartons may use an agreed sampling approach. The method, sample size and acceptance decision rules should be agreed before manufacture where they matter to the buyer.
Final release checklist
Before release, verify:
- The finished product matches the current approved artwork and structural reference.
- Materials and finishes are those specified or are supported by an approved variation.
- Critical print, converting and assembly requirements have been checked.
- Product-facing panels are free from defects beyond the agreed acceptance criteria.
- Functional features, such as closures, folds and inserts, work as intended.
- Required labels, codes and markings are present and correctly positioned.
- Quantities are reconciled, including accepted stock, rework and rejects.
- Pack-out follows the agreed configuration and protects the finished packaging.
- Non-conformances are closed, contained or covered by written concession.
- Release records identify the job, date, reviewer and decision.
Common release mistakes to avoid
The following practices create unnecessary risk:
- Using a digital artwork proof as the only quality reference for a finish-sensitive job.
- Inspecting only flat sheets when carton folding, gluing or product fit is critical.
- Treating every visual difference as a defect without considering the approved material and reference sample.
- Accepting a variation informally and failing to update the job record.
- Checking appearance but not function, particularly for closures, inserts and e-commerce mailers.
- Leaving pack-out instructions vague, which can lead to mixed variants or transit damage.
- Assuming universal tolerances apply to colour, dimensions or cosmetic marks when no job-specific criterion was agreed.
Choosing quality control checkpoints for your packaging project
The right number of checkpoints is driven by risk, not by a fixed template. Add stronger controls when a failure would be highly visible, difficult to rework or costly to discover after dispatch.
Consider more detailed controls where your packaging includes:
- Brand-critical colours or detailed photographic imagery
- Metallic foils, embossing, textured stocks or multiple finishing processes
- Small type, regulatory copy, barcodes or QR codes
- Complex dielines, multi-part construction or inserts
- High-value retail presentation
- Several product variants that could be mixed during packing
- A packaging format that must protect a product through e-commerce fulfilment
- New materials, revised artwork or a new structural design
For a repeat order, do not assume the previous specification is still current. Reconfirm the artwork version, material, finish, pack quantity and any known quality sensitivities. A repeat job is easier to control when prior approved references and resolved issues are retained.
FAQ
What is the most important packaging quality control checkpoint?
First-off approval is often the most valuable checkpoint because it compares real production output with the approved references before the full quantity is completed. However, it cannot replace final release checks, especially where finishing, assembly or pack-out can introduce later defects.
Should packaging quality be checked by a sample or by written specifications?
Use both. Written specifications define measurable or repeatable requirements, while a signed-off physical sample helps communicate visual expectations for colour, substrate and finishing. If they conflict, resolve the difference before production and document the controlling reference.
Can a supplier set the acceptance criteria?
A supplier can recommend practical inspection criteria, but the brand owner or buyer should confirm what matters for their product and sales channel. The final criteria should be mutually agreed, especially for colour-critical, premium or functional packaging.
How do you prevent the wrong artwork version from being printed?
Use a controlled artwork approval process: assign a version identifier, withdraw superseded files, identify the approved file on the production record and verify it again at first-off and final release. Avoid relying on file names alone when several revisions exist.
A clear control plan makes packaging quality easier to manage, compare and approve. Start by listing the features customers will notice and the functions the packaging must perform, then assign a reference and checkpoint to each one. If you are developing a new pack format, review XGolden Print’s custom packaging options alongside your quality requirements before finalising the production brief.
