
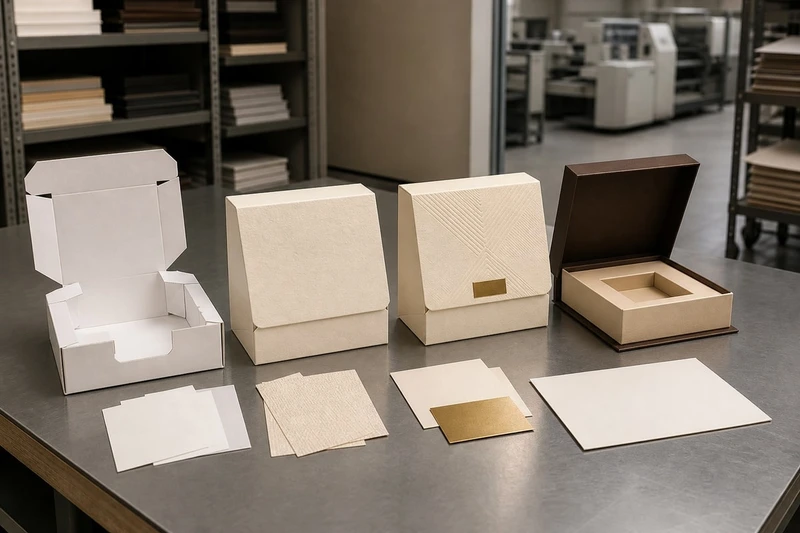
A packaging prototype sample approval process reduces the risk of receiving boxes that look right in a PDF but fail when filled, assembled or displayed. The most reliable approach is to approve packaging in stages: first the structure, then print and finish, then the packed product experience.
No single sample can prove everything. A digital artwork proof can confirm copy and layout, while a plain structural mock-up can confirm fit. A printed production-style sample is needed to assess colour, finish and assembly together. Record exactly what was approved at each stage before production is released.
Choose digital, white and printed sample stages
Choose the sample stage according to the decision you need to make. Requesting a highly finished sample before dimensions and pack-out are settled can waste both time and budget. Conversely, relying only on a digital proof leaves critical physical questions unanswered.
| Sample stage | Best used to check | Cannot reliably prove |
|---|---|---|
| Digital artwork proof | Copy, barcodes, logo placement, dieline layout, panel order and basic design | Physical dimensions, material feel, folding, colour on the final stock or foil alignment |
| White sample or structural prototype | Internal fit, external dimensions, folds, closures, inserts and opening sequence | Printed colour, final material appearance, varnish, foil, embossing or coating performance |
| Printed sample | Artwork placement, approximate print appearance, finish choices, assembly and presentation | Full production consistency unless it is expressly made with the agreed production materials and process |
| Production trial or pre-production sample | Combined structure, materials, print, finish and pack-out against the agreed specification | Every possible variation across an entire production run |
Start with an artwork proof for content accuracy
A digital proof is generally the fastest point at which to identify content mistakes. Check the approved dieline is being used and inspect every panel at full size where possible.
Your proof review should cover:
- Brand marks, legal text and product claims
- Ingredient, warning or care information where applicable
- Barcode number, quiet zones, orientation and scan testing
- Product variant names, colours and SKU references
- Spelling, punctuation and Australian English conventions
- Image resolution and whether important details sit too close to folds, cuts or glue areas
- Correct orientation of front, back, base and side panels
A PDF proof is an artwork approval, not a colour approval. Screens vary significantly, and even calibrated displays are not a substitute for a physical print made on the specified substrate.
Use a white sample to remove structural uncertainty
A white sample, sometimes called a blank dummy or structural mock-up, is the most useful early-stage test for most custom boxes. It gives the team something physical to fill, fold, open and assess without making printing the focus too soon.
For example, a retailer developing a skincare carton may need to check whether the bottle can be removed without damaging the carton, whether the insert holds it upright and whether the closure still works after staff assemble several units. Those questions are best answered with a structural prototype.
For products that require tailored dimensions, review the available custom box formats alongside the product measurements before finalising the dieline. Measure the actual product, including lids, pumps, cables, protective wrapping and any components that travel inside the pack.
Request a printed sample when appearance affects the buying decision
A printed sample is valuable where colour, tactile finish or shelf presentation affects the product’s appeal. It is particularly relevant to premium gift boxes, cosmetics, food presentation packaging and retail cartons featuring detailed photography or tight brand colour requirements.
Ask what process and materials will be used for the sample. A sample produced differently from the final order may still help with artwork placement and general presentation, but it has limits. It should not be treated as conclusive evidence of the final print result.
For presentation-led packs, compare gift packaging options with the intended unboxing and retail display environment. A rigid presentation box, folding carton and corrugated mailer can create very different opening experiences, even when they carry similar graphics.
Check structure, product fit and the opening experience
The product should fit securely without requiring excessive force to insert or remove. A carton that is too loose can rattle and scuff its contents; one that is too tight may bow, split at a seam or frustrate the customer.
Check fit using actual saleable product wherever possible. Substitute items can be misleading if their dimensions, weight, surface finish or protective wrapping differ from the final item.
Measure the complete packed product, not just the product itself
Create a simple measurement record before approving the packaging prototype:
| Item to measure | Why it matters |
|---|---|
| Product length, width and height | Establishes the minimum usable internal space |
| Highest and widest points | Captures pumps, lids, handles, protrusions and irregular shapes |
| Product weight | Influences board selection, insert design and carrying comfort |
| Protective wrap or tissue | Changes the internal volume and removal friction |
| Accessories and paperwork | Prevents a last-minute need to force items into the carton |
| Display or transit orientation | Affects insert layout, opening direction and graphics orientation |
Dimensions should specify whether they are internal, external or flat dieline measurements. This avoids a common error: approving an external box size while assuming the same measurement is available internally.
Test the first opening and repeat opening
The opening experience matters because it is where a customer, retail worker or fulfilment team first handles the pack. Test it as an action, not simply as a visual impression.
Check whether:
- The lid, tuck flap, tear strip or magnetic closure is intuitive.
- The product can be removed without tipping or catching.
- Tabs fold in the expected order.
- The closure stays closed after normal handling.
- Reopening the pack causes creasing, tearing or visible damage.
- A finger notch, ribbon pull or thumb cut-out is needed.
- The box can be opened without obscuring important product information.
- Staff can assemble the box at a practical pace, if it will be packed by hand.
For retail products, also consider how the box sits on shelf. Front-facing graphics, a hanging tab, a window and the base construction all need to work in the orientation customers will actually see.
Review material, colour and finish limits
Material, colour and finishing decisions should be assessed with realistic expectations. The same artwork can appear different on uncoated paper, coated board, kraft stock or corrugated material because each surface absorbs or reflects ink differently.
A packaging prototype sample approval should identify the material by a clear description, not by a vague phrase such as “white card” or “matte paper”. Record the agreed board or paper type, weight or thickness where applicable, colour, coating, and any lamination or finishing treatment.
Treat screen colour as a guide, not a final reference
Digital files use emitted light, while printing uses physical inks on a physical surface. This means bright screen colours, subtle tonal gradients and dark solid areas may look different in print.
Pay particular attention to:
- Brand colours with a narrow acceptable range
- Pale greys, creams and blush tones, which can shift noticeably with stock colour
- Deep blacks, which may reveal scuffs or unevenness depending on material and finish
- Fine reversed text, especially white text on dark backgrounds
- Photographs with dark shadows or highly saturated colours
- Metallic effects, which cannot be accurately represented in an ordinary PDF
If an exact colour is commercially important, specify the relevant colour reference and agree how it will be interpreted for the chosen substrate and printing method. Do not assume a printed result will match an on-screen RGB value.
Assess finishes under normal handling conditions
Gloss, matte and soft-touch finishes can change the perceived value and durability of a pack, but they also introduce trade-offs. Gloss may make colours appear more vivid, while matte can reduce glare. Dark matte surfaces may show fingerprints or scuffs more readily. Foil, embossing and debossing need sufficient space from folds, cut lines and glued areas.
When reviewing a finished sample, inspect it in daylight and typical indoor retail or office lighting. Handle it with clean, dry hands and examine high-contact areas such as lids, tabs, corners and opening edges.
Confirm these details before approval:
- Finish type and where it applies
- Whether the finish covers the inside, outside or selected panels only
- Foil colour and intended placement
- Embossing or debossing depth and artwork position
- Spot UV area and its relationship to creases
- Window material, size and attachment method
- Acceptable visual variation for natural or textured stocks
Test assembly and pack-out before approving production
A box can look excellent as a flat sample but become impractical during fulfilment. Pack-out testing reveals whether the packaging is workable at the point where products are inserted, sealed, stored and dispatched.
Run a small practical trial with the intended product and all pack components. Include inserts, tissue, labels, promotional cards, tamper seals, protective sleeves and any outer shipping carton used in your normal process.
Run a simple pack-out test
Use this sequence:
- Assemble the box exactly as planned.
- Pack the actual product and every included component.
- Close, seal or label the pack using the intended method.
- Repeat the task several times, ideally with more than one person.
- Check the result for bulging, rattling, crushed corners, loose closures or marking.
- Place packed units into their secondary carton or mailing pack.
- Review how the units stack, face and remain protected in transit.
Record any adjustment required after the trial. A 1–2 mm change to an insert, a revised tuck tab or extra clearance around wrapped products can materially improve the packing process.
Consider the product journey, not just the individual box
A retail carton may need to withstand shelf handling and occasional customer inspection. An e-commerce pack may need to work inside a protective mailer or shipping carton. A gift box may need to arrive clean enough to be given without an outer retail sleeve.
These uses create different priorities:
- Retail display: shelf-facing orientation, visual consistency, barcode position and ease of stocking.
- E-commerce fulfilment: protection within the outer parcel, efficient packing and minimal movement.
- Gift presentation: premium opening sequence, clean finish, secure closure and room for gift messages or tissue.
- Subscription or repeat purchase: simple packing routine, predictable component placement and efficient storage.
Do not assume decorative packaging is a shipping carton. If a presentation box will travel directly to a customer, test it with the relevant external protective packaging.
Record changes and approved references
An approval is only useful when everyone can identify what was approved. Verbal feedback, email threads and marked-up screenshots often lead to conflicting versions if they are not consolidated into one controlled record.
Create an approval pack that brings together the final artwork, structural drawing, sample photographs and written decisions. This gives procurement, marketing, product and operations teams the same point of reference.
What to include in an approval record
Your production approval should include:
- Project name, product name and SKU or variant
- Approval date and approver name or role
- Artwork file name, version number and final PDF reference
- Dieline or structural drawing version
- Internal and external dimensions, clearly labelled
- Material and finish description
- Print colours or agreed colour references
- Insert, divider or window specifications
- Assembly instructions, where the construction is not obvious
- Pack-out configuration and relevant orientation notes
- Photos of the approved physical sample, including inside views
- A clear list of accepted deviations or known limitations
- Any changes requested after the sample review
Photographs are useful supporting evidence, but they should not replace the actual specification. Lighting can affect colour in photographs, and a close-up may not show material thickness or construction accurately.
Write changes as instructions, not impressions
Comments such as “make the logo slightly bigger” or “the fit feels loose” leave too much room for interpretation. Replace subjective feedback with measurable or visible instructions.
For example:
- “Increase front-panel logo width from 38 mm to 44 mm; retain centred alignment.”
- “Move barcode 5 mm away from the lower fold line.”
- “Reduce insert cavity width by 2 mm after testing with the wrapped bottle.”
- “Use the approved sample’s matte outer finish; no coating on internal surfaces.”
- “Keep the foil clear of the top crease by the agreed safe margin.”
If a change affects dimensions, artwork, material or finishing, it should trigger a revised file version and, where appropriate, another sample review.
Release production with clear version control
Production should be released only after one defined version is approved. The most frequent avoidable error is a team member sending an older artwork file, outdated dieline or unrecorded change alongside the final instructions.
Use a simple version-control convention that everyone can follow. For example, keep the project name, SKU, revision and approval status in each file name. Avoid labels such as “final final”, “new one” or “latest” because they lose meaning quickly.
Create a final production release checklist
Before release, confirm:
- The final artwork and dieline have matching revision numbers.
- All requested changes are incorporated into the files.
- The approved sample is identified by date, revision or photo reference.
- Dimensions are stated as internal or external.
- Materials, finishes and colour expectations are documented.
- The order quantity, pack configuration and delivery requirements are separate from the design approval.
- Barcodes, product information and variant names have been checked one final time.
- Stakeholders from brand, product, procurement and fulfilment have completed their required review.
- A single person or role has authority to issue the final production approval.
Keep the approved files in a shared location with read-only control after sign-off. If an amendment is needed later, create a new revision rather than overwriting the approved version.
Know when a re-sample is worthwhile
A re-sample is sensible when a change could affect fit, appearance or production outcome. This includes a different board, revised box dimensions, a new insert, altered closure, changed finish, major colour adjustment or moved artwork near a fold or cut line.
A re-sample may be less necessary for small text corrections that do not alter layout, provided all stakeholders agree that the physical construction and finish remain unchanged. The key is to document why a new physical sample was or was not required.
Common packaging sample approval mistakes
Avoiding a few recurring errors can make approvals faster and more reliable.
- Approving colour from a screen: Use a physical reference for colour-critical work.
- Testing with an unwrapped product only: Include all wraps, accessories and inserts.
- Ignoring assembly time: A complex box may be attractive but inefficient to erect and pack.
- Approving an unlabelled sample: A sample without revision details is difficult to trace later.
- Treating a prototype as a transport test: Test the full packed parcel if it will be shipped.
- Not checking the base: Base panels carry weight and can affect display stability.
- Leaving decisions in email comments: Consolidate them into the controlled approval record.
- Making changes after sign-off without a new revision: Even minor alterations can create costly mismatches.
FAQ
Is a packaging prototype the same as a production sample?
Not necessarily. A prototype usually proves a structural concept, such as dimensions, folds and product fit. A production-style sample is intended to represent the agreed materials, printing and finishing more closely. Ask which elements of the final specification a sample does and does not represent.
How many packaging samples should be approved?
The right number depends on the complexity and risk of the project. Many projects benefit from a digital artwork proof, a white structural sample and a printed or production-style sample. Straightforward repeat orders may need fewer stages if the structure and specification are already controlled.
Who should approve custom packaging?
In most businesses, brand or marketing should approve artwork, product teams should confirm fit, procurement should verify the specification, and operations or fulfilment should test assembly and pack-out. Assign one final approver to prevent conflicting instructions.
What happens if the sample and final production differ?
First compare the production result against the written specification and approved reference, not only memory or a screen image. This is why the approval pack should record the sample stage, material, artwork revision, finish and any acknowledged limitations.
A disciplined packaging prototype sample approval process turns subjective feedback into clear production instructions. Start by proving the structure, then test the printed appearance and pack-out, and release only the version that has been documented and approved. For teams planning a new custom packaging project, XGolden Print’s company information can provide useful background alongside your own specification and sample checklist.
