
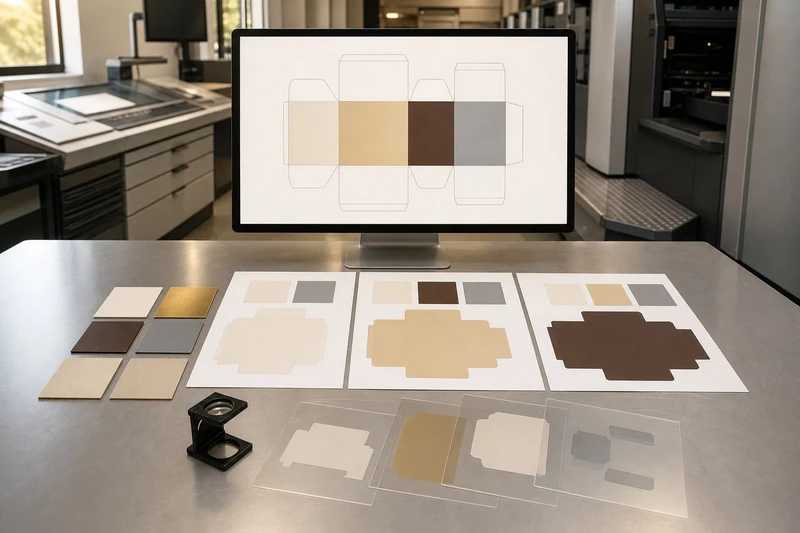
A packaging artwork preflight checklist is the final technical review of your files before production. It confirms that the approved dieline, artwork, images, colours, special finishes and version details all match the packaging specification.
Preflighting is not simply looking for spelling errors. It is a structured check designed to prevent costly issues such as text falling into cut lines, missing fonts, incorrect barcode placement, unexpected colour changes or foil appearing in the wrong area. Complete the review before issuing a final print-ready PDF or packaged artwork folder.
Confirm the approved dieline version
Start with the dieline. Every other part of the artwork depends on it being correct.
A dieline shows the cut, crease, fold, glue and bleed areas needed to make the packaging. Small changes to board thickness, box style, closure design or manufacturing method can affect panel dimensions and fold positions. Do not assume a dieline from an earlier sampling round or a similar-sized box is interchangeable.
Check these points before placing final artwork:
- File version: Confirm the file name, revision number and issue date match the dieline approved for production.
- Finished dimensions: Compare the dieline’s length, width and depth with the signed-off packaging specification.
- Panels and orientation: Make sure front, back, side, top and base panels are correctly identified. This is particularly important for cartons with mirrored side panels.
- Bleed: Extend background colours, images and edge-to-edge patterns beyond the cut line by the amount specified in the supplied dieline or print brief.
- Safe area: Keep essential text, logos, barcodes and fine details inside the safe area, away from cuts, creases and glued sections.
- Fold and crease lines: Check that headlines, faces, product photography and critical design features do not split awkwardly across folds.
- Glue areas: Leave glue flaps clear unless the packaging supplier has specifically confirmed that printing is acceptable in those areas.
- Cutouts and windows: Confirm any window, hang hole, notch or other structural feature is reflected in the current dieline.
Keep technical dieline information on a separate non-printing layer where requested. Cut, crease and glue guides should not accidentally appear in the printed result.
Use the dieline at full size
Review the dieline at 100% scale, not just as a small image on screen. Fine copy can look comfortably positioned when zoomed out but become too close to a fold or trim edge at actual size.
For high-value packaging, produce a full-size paper mock-up. Print it, cut it out and fold it along the indicated creases. This quick check can reveal upside-down panels, interrupted patterns, difficult-to-read side copy and artwork that wraps poorly around corners.
If you are still choosing the pack structure, compare the artwork requirements with the available custom box formats before committing to a visual layout. A simple structural adjustment early in the process is usually easier than reworking finished art later.
Check linked images, fonts and resolution
Missing assets and low-resolution images are among the most common preflight failures. A PDF can appear correct on one computer while relying on links or fonts unavailable to the production team.
Images: links, scale and effective resolution
Where working files are being supplied, gather all placed or linked images into the project folder. Do not rely on files stored only in a personal downloads folder, shared desktop location or cloud link that others may not be able to access.
Check every image for:
- Correct placement and crop
- Current product photography or approved illustration
- Appropriate colour mode for the print workflow
- No accidental low-resolution previews or thumbnail images
- No unexpected pixelation after scaling
- Sufficient effective resolution at its placed size
For most standard printed packaging images, a typical target is around 300 ppi effective resolution at final size. “Effective” matters: an image may have a high original resolution, but enlarging it in the layout reduces the resolution available for print.
Very fine line art, monochrome artwork and detailed codes may need higher effective resolution or vector artwork. Conversely, large-format graphics can sometimes use a different resolution target. Always follow the printer’s artwork specification where one has been provided.
Avoid rebuilding logos from low-resolution screenshots. Use the approved vector file, such as AI, EPS, SVG or a properly created vector PDF, where available.
Fonts: embed, package or outline with care
Fonts can reflow, substitute or fail to render if they are not embedded correctly. Review the final PDF to confirm that all fonts are embedded, then inspect it visually for changed line breaks, missing characters and altered weights.
If the production team requests editable artwork, provide a packaged folder containing:
- The native layout file
- Linked images
- Font files, where licensing permits sharing
- A print-ready PDF
- A readme or job sheet identifying the final file
Outlining type can remove font-dependency problems, but it also makes text harder to edit and can introduce issues with small type or complex scripts. Keep an editable master with live text even if an outlined production copy is required.
Check transparency, effects and placed PDFs
Transparent shadows, blending modes, clipping masks and placed PDF graphics may process differently depending on the workflow. Inspect the output preview for unwanted boxes, flattened edges, colour shifts or missing objects.
A reliable approach is to export a press-ready PDF using the printer’s preferred settings, then open that exported PDF separately. Do not assume that the source design file and exported file will display identically.
Review colour and overprint settings
Colour is a production decision as well as a design choice. Preflight should confirm how every colour is intended to reproduce: process CMYK, spot colour, white ink, metallic ink or a special finishing separation.
Check colour builds and profiles
Review all swatches and placed graphics for unintended RGB, Lab or duplicate spot colours. RGB images may look bright on screen but can change noticeably when converted for print. For packaging, use the colour workflow specified by the printer rather than applying a generic conversion at the last minute.
Check the following:
- Brand colours use the agreed CMYK values or correctly named spot colours.
- Black text and fine black rules use the intended build.
- Rich black is used only where suitable, such as larger solid areas, not automatically for small type.
- Identically named spot colours have consistent definitions.
- White objects are not accidentally set to overprint.
- Colour names for special processes are unambiguous.
A monitor is not a proof of printed colour. Screen brightness, device settings, substrate colour, coatings and print process all influence the appearance of the finished pack. If colour accuracy is critical, ask what proofing or physical sample options are available and what tolerances apply to the selected process and material.
Inspect overprint and knockout
Overprint means one element prints on top of another rather than knocking out the background beneath it. It can be intentional—for example, black text over a coloured background—but accidental overprint can make white text disappear or make colours look darker than expected.
Turn on overprint preview in your PDF review software and inspect:
- White text, logos and graphics
- Small black type over coloured backgrounds
- Light-coloured text over dark artwork
- Spot-colour objects
- Areas where transparent effects meet solid fills
- Black elements intended to knock out
Do not rely on normal screen preview alone. It may not show how overprint settings will behave in production.
Keep colour expectations realistic
Printed colour can vary between uncoated and coated boards, white and coloured stocks, different production runs, and different print technologies. Metallic foil is not a substitute for metallic ink, and a CMYK simulation of gold will not have the reflectivity of actual foil.
Record the intended result in the job specification. For example: “logo to print as Pantone spot colour” or “gold logo to be applied as metallic foil”. Clear wording reduces the chance of a design cue being mistaken for a production instruction.
Separate foil, emboss, varnish and cut layers
Special finishes require their own clearly labelled production layers or spot-colour separations. Visual effects in the artwork—such as a gold gradient, a bevel effect or a glossy-looking shape—do not by themselves tell a production team where to apply foil, embossing or varnish.
Create separate technical layers for each special process, based on the supplier’s file requirements.
| Production element | What to supply | Key preflight check |
|---|---|---|
| Foil | A named spot-colour vector shape | Confirm the foil area is separate from printed gold artwork and does not contain unintended gaps. |
| Emboss or deboss | A named spot-colour vector shape | Check that fine detail, small text and close elements are suitable for the effect. |
| Spot UV or raised varnish | A named spot-colour shape | Keep the varnish layer aligned with the underlying artwork and check clearance from folds. |
| White ink | A named spot-colour shape | Specify whether white is a base layer, visible design element or both. |
| Cut, crease or perforation | A non-printing technical line layer | Confirm line colours, stroke styles and layer naming match the supplied artwork guide. |
| Window patch or adhesive area | Clearly marked technical layer | Ensure the intended adhesive or patch area does not cover essential printed details. |
Use solid vector shapes for finishing layers
Special-finish layers should generally be clean, solid vector shapes, not low-resolution raster images. Avoid unclear opacity settings, feathered edges and decorative effects unless they have been approved for that process.
Check registration allowances as well. A varnish shape that exactly traces very fine print may reveal slight alignment variation. Depending on the finish and design, trapping, choking or spreading may be required. The correct allowance varies by process, artwork and substrate, so confirm it with the production specification rather than applying a universal value.
Name layers so they cannot be misread
Use direct names such as:
FOIL_GOLDEMBOSSSPOT_UVWHITE_INKCUT_CONTOURCREASEVARNISH_MATT
Avoid names such as Layer 7, final effect, gold maybe or use this. Include the same terminology in the job sheet and final approval PDF.
If packaging includes labels as well as cartons, apply the same separation discipline to custom stickers and labels. In particular, confirm whether a white base is needed behind colour artwork on clear, metallic or coloured label materials.
Inspect small text, codes and quiet zones
Small details can be technically present in a PDF yet still be difficult to read after printing, coating, folding or handling. Review them at actual size and in context with the selected board, finish and print process.
Check minimum text and line detail
There is no single safe minimum point size for every packaging job. Legibility depends on the typeface, weight, colour contrast, ink coverage, print method, substrate and whether text is reversed out of a dark background.
As a practical review, inspect:
- Fine serif type and lightweight sans serif type
- Reversed-out white copy
- Legal and ingredient information
- Expiry-date fields and batch-code areas
- Registration marks or tiny icons
- Hairline rules
- Text printed near folds, seams or curved edges
- Copy over photographs, textures or metallic effects
Do not use extremely thin rules merely because they look refined on screen. Ask the printer for its minimum line and text guidance if the design relies on fine detail.
Verify barcodes, QR codes and quiet zones
Barcodes and QR codes need more than visual checking. Confirm that the code content is correct, the symbol has not been distorted and its surrounding clear space is protected.
For barcodes:
- Keep the barcode at its intended proportions; do not stretch it horizontally or vertically.
- Preserve the clear area around the barcode, often called the quiet zone.
- Do not place folds, varnish, foil, artwork texture or glare-prone features through the bars.
- Use sufficient contrast between bars and background.
- Leave space for any human-readable number required below the code.
- Verify the final code data against the product and inventory system.
For QR codes:
- Use the correct destination URL or data.
- Retain the quiet zone around all four sides.
- Avoid placing the code across folds or curved panels.
- Test scan the final-size code from a proof or accurate full-size output where possible.
- Do not add decorative elements that obstruct the finder patterns in the corners.
A phone scan is useful, but it is not necessarily a substitute for formal barcode verification where a retailer, logistics system or industry requirement calls for a particular verification grade. Confirm the relevant requirement with the party that will receive or scan the product.
Package and approve the final production files
The final stage is to issue one controlled set of production files. Sending multiple “final”, “final final” or email-amended versions creates avoidable risk.
Prepare a clean production package
Your handover folder should normally contain:
- Final print-ready PDF
Exported using the agreed standard, with the correct pages, dimensions, bleed and marks where requested.
- Editable source files
Supply only if requested, with all linked images and permitted font files included.
- Approved dieline
Include the exact version used to build the artwork.
- Production notes or job sheet
State substrate assumptions, print colours, special finishes, pack quantity where relevant, artwork scale and any essential instructions.
- Approval proof
A clearly marked PDF or proof image showing the version approved for production.
- Asset list, if needed
Useful for complex jobs with multiple SKUs, language versions, labels or variable data.
Use a consistent naming convention. For example:
Brand_Product_Box_250g_REV03_PRINT.pdf
Avoid vague filenames such as new box.pdf, correct one.pdf or use this file.pdf. If there are multiple SKUs, include the product name, size, flavour, colourway or item code in each filename.
Run a final sign-off checklist
Before approval, have the responsible stakeholder check the production PDF—not only the editable design file—against this list:
- Correct product name, variant, ingredients, claims and mandatory copy
- Correct dieline revision and finished dimensions
- Correct barcode, QR code and contact details
- Correct language versions and SKU identifiers
- Correct colour call-outs and special-finish layers
- No visible dieline, guide, note or placeholder text
- No missing images, fonts or page elements
- Correct page count and artwork orientation
- Clear safe zones around trims, folds, codes and key text
- Approved version number and date recorded
Assign one person or team as the final approval owner. Feedback from marketing, product, procurement and retail teams is valuable, but production needs a single unambiguous approval decision.
Keep an approval record
Save the approved PDF, approval email or sign-off record, source files and job specification together. This creates a reliable reference for reprints, future edits and investigations if a discrepancy is discovered later.
Version control is especially important when packaging artwork contains seasonal changes, promotional stickers, retailer-specific barcodes or frequent regulatory copy updates. A central folder with access controls is usually safer than passing files between individuals without a tracked revision process.
Common packaging preflight mistakes
The most damaging issues are often simple and preventable:
- Designing on an outdated dieline
- Leaving trim, crease or cut lines visible in the printable artwork
- Placing critical copy too close to a cut or fold
- Supplying RGB images or inconsistent spot-colour names
- Using a screen-only visual effect to indicate foil or varnish
- Forgetting to include special-finish separations
- Sending a source file with missing linked images
- Assuming fonts will transfer correctly without embedding or packaging
- Distorting a barcode or reducing its quiet zone
- Approving a low-resolution email preview rather than the final production PDF
- Sending several conflicting files with no stated final version
FAQ
Is a print-ready PDF enough for packaging production?
Often, a print-ready PDF is the primary production file, but requirements vary. The supplier may also need the approved dieline, named special-finish layers, editable source files or a job sheet. Confirm the required format before final export.
Should cut and crease lines be included in the final PDF?
Include them only as directed by the production artwork guide. They are commonly placed on a separate technical layer or supplied in a working PDF for reference, rather than appearing as printable artwork.
Can I use RGB artwork for packaging?
RGB artwork may be accepted for conversion in some workflows, but it can produce colour changes and reduce predictability. For branded packaging, use the colour setup requested for the job and review colour expectations before approval.
How many people should approve packaging artwork?
Involve the people responsible for content, brand, product and procurement where needed, but nominate one final approval owner. One controlled sign-off helps prevent conflicting instructions reaching production.
A thorough packaging artwork preflight checklist protects the visual design, functional structure and product information at the point where changes become more difficult to make. Review the final production PDF at full size, document every special process clearly and approve only one controlled version before release.
