
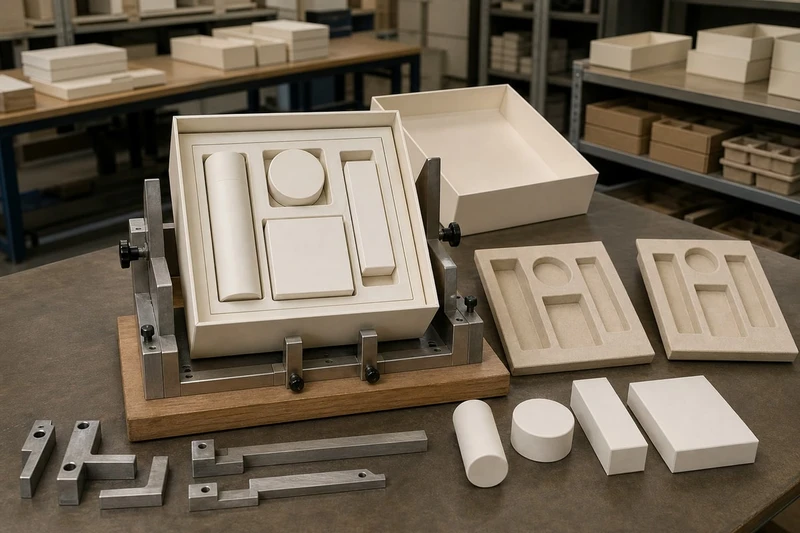
Multi item gift box insert planning starts with the full set, not the outer box. List every item that will be packed, decide what the customer should see first, then design each cavity around real product dimensions and handling needs.
A well-planned insert does three jobs at once: it keeps components in place during handling, makes the set easy to assemble, and creates a deliberate unboxing experience. The best solution is rarely the insert with the most compartments. It is the one that protects the products without making removal, replenishment or packing unnecessarily difficult.
List every component and variation
Create a set inventory before choosing an insert style or requesting a dieline. Include every object that goes into the finished gift pack, including small accessories that are easy to overlook during early planning.
Your list may include:
- Primary products, such as bottles, jars, candles, apparel or electronics
- Secondary products, including refills, samples or travel-size items
- Accessories, such as pumps, lids, cables, brushes, utensils or chargers
- Printed pieces, including greeting cards, instruction leaflets and warranty information
- Promotional items, samples or seasonal additions
- Seals, tissue paper, ribbons, protective sleeves and tamper-evident elements
- Any packing aids needed inside the box, such as paper wraps or protective pads
For each item, record the following details:
| Information to record | Why it matters for insert planning |
|---|---|
| Product name and SKU | Prevents similar components being confused at pack-out |
| Finished dimensions | Establishes cavity width, length and depth |
| Weight | Affects board choice, retention and box strength |
| Shape and orientation | Determines whether a standard cavity will work |
| Fragility | Identifies where cushioning or separation is required |
| Surface sensitivity | Helps avoid scuffing, scratches and transfer marks |
| Required presentation face | Keeps labels, branding or product features visible |
| Packing condition | Confirms whether the item is capped, wrapped, folded or assembled |
| Variation by SKU or season | Shows whether one insert can serve several configurations |
Account for real product variation, not nominal dimensions
A product’s catalogue dimensions may not be sufficient for insert design. Measure finished production samples wherever possible. The actual packed item can differ because of caps, seams, labels, shrink sleeves, folds, protective bags or manufacturing tolerance.
For example, a skincare set may use identical bottle bodies but different pump heights. A wine gift pack may use bottles with noticeably different shoulder shapes. A corporate gifting program may add a branded notebook to only some configurations. These differences affect both cavity geometry and the final box depth.
If multiple variants must share one packaging format, identify the maximum and minimum dimensions for each cavity. Then decide whether the insert needs:
- A universal cavity with a controlled clearance range
- A removable adaptor or spacer
- A separate insert for each configuration
- An interchangeable top tray for the variable item
- A fixed box with different printed or die-cut insert components
Trying to make one rigid insert suit products with very different shapes often produces poor retention and an untidy presentation. In many cases, separate insert variants are simpler and more reliable than an overly flexible “one size fits all” design.
Separate mandatory components from optional ones
Mark each component as either mandatory, optional or market-specific. This is especially important for gift sets that change between promotional periods, retail channels or online bundles.
An optional cavity left empty can make a premium pack look incomplete. Better options include using an insert version without that cavity, adding a purpose-designed promotional card, or creating a modular arrangement that does not expose unused space.
Set the reveal sequence
The reveal sequence is the order in which the customer encounters products after opening the gift box. It should support the product story while keeping the heaviest, most fragile and least attractive packing elements appropriately placed.
Start by answering three questions:
- What should the recipient notice immediately on opening the lid?
- Which item is the hero product?
- Which components need instructions, protection or secondary access?
For many sets, the opening experience follows a simple hierarchy:
- Lid message, printed tissue or a presentation card
- Hero product or visually strongest item
- Supporting products arranged around or beneath it
- Accessories, instructions or replenishment items
- Less visual but essential items, such as charging cables or care information
This is not a fixed formula. A practical kit, for instance, may need a quick-start guide on top so the recipient knows how to use its contents. A food gift set may need allergen or storage information positioned where it is visible before products are handled. For a premium presentation set, a card or tissue layer can create a controlled first reveal before the insert is exposed.
Choose between single-level and layered inserts
A single-level insert suits sets where all components should be visible at once. It can make selection easy in retail, reduce assembly steps and simplify inventory checks. However, it may require a larger box footprint.
A layered insert can reduce footprint, provide a more staged reveal and protect flat materials beneath heavier products. Common layouts include:
- A top tray for the main product with a lower compartment for accessories
- A lift-out card or tray revealing a second tier
- A hinged inner panel that covers supporting items
- A removable platform holding a hero item above smaller components
Layered structures add assembly complexity. Each layer should have a clear way to lift or remove it, such as finger cut-outs, ribbon pulls, thumb notches or a safe exposed edge. Avoid relying on tightly wedged trays that need excessive force to remove.
Keep product orientation intentional
Decide whether labels should face upward, toward the opening edge, or toward the recipient when the lid is opened. This matters particularly for cosmetics, beverages, branded merchandise and sets displayed in a retail environment.
Also consider the orientation used during packing. If a product can only enter the cavity one way, the packing team needs a clear visual cue. A shaped cavity, printed insert graphic or straightforward pack-out guide can reduce orientation errors.
Map product footprints and clearances
Once the full configuration and reveal sequence are settled, create a layout map. Treat the insert as a system of product footprints, handling zones and structural bridges—not simply a collection of holes.
For every component, map:
- Overall length, width and height
- The widest point, which may not be at the base
- Areas that must not be compressed, such as pumps, switches or delicate decorations
- The preferred contact points for retention
- The product’s centre of gravity
- The direction in which it will be inserted and removed
- Clearance for fingers, pull tabs or other removal aids
- Space required for wrapping, sleeves or protective materials
Build clearance around the product’s real packing condition
The cavity dimensions need enough allowance for repeatable packing and removal, but not so much that products move freely. The correct clearance depends on the material, item weight, product shape, production variation and whether the cavity itself flexes.
As a general principle:
- Rigid, precisely shaped inserts can use closer dimensional control.
- Folded board inserts usually need more allowance than moulded formats.
- Wrapped or bagged products need extra room for the packing layer.
- Heavy products may need tighter side control and a stronger base.
- Soft goods can tolerate broader cavities but may need straps, folds or partitions to maintain presentation.
Do not assume that an item that fits into a cavity is adequately retained. Test how it behaves when the box is carried, tilted, opened and reclosed. A tall item can look secure upright but shift sideways once the box is moved.
Protect neighbouring items from contact
Each product should have enough separation to prevent damage during transport and handling. Glass, metal, coated paper, polished plastic and printed surfaces can all be affected by rubbing or impact.
Where products are packed side by side, consider:
- Divider walls between hard items
- A recessed cavity rather than an open tray
- Tissue, sleeves or wraps for surface-sensitive products
- A top pad to stop vertical movement
- Increased board strength around heavy components
- A separate compartment for loose accessories
Avoid positioning heavy products so they can move into fragile items if the box is tipped. In a mixed set, it is usually safer to isolate the heaviest component rather than relying on the surrounding products to hold it in place.
Design for removal as well as retention
A common multi-item gift packaging mistake is making products secure but difficult to remove. Customers should not need to shake the box, bend a cavity or pry an item out with fingernails.
Practical removal features include:
- Finger notches at one or two sides of a product
- Ribbon pulls beneath flat or snug-fitting items
- Thumb holes in trays
- Cut-out windows that provide a grip point
- Lift tabs for internal panels
- A slightly angled cavity that supports controlled removal
Check that these features work for a range of hand sizes and for customers with limited dexterity. A pull ribbon should be long enough to grasp without obscuring the product. A finger notch needs sufficient depth to be useful, not merely decorative.
Choose insert materials and retention
The best insert material depends on the product’s weight, shape, finish, presentation goal, environmental requirements and assembly process. There is no universal “premium” material; a suitable choice should match the actual job.
| Insert option | Best suited to | Advantages | Watch-outs |
|---|---|---|---|
| Folded paperboard insert | Lightweight to moderate-weight products and regular shapes | Printable, efficient to ship flat, adaptable for compartments | May need reinforcement for heavy or tall products |
| Rigid board platform or tray | Premium sets, bottles, jars and heavier products | Strong presentation, good structure, supports layered reveals | Usually takes more space and may involve more assembly |
| Corrugated insert | Larger, heavier or transport-focused packs | Good cushioning and structural support | Surface appearance may not suit a high-end unboxing experience without a cover layer |
| Paper pulp insert | Products needing shaped support and a fibre-based look | Can cradle irregular shapes and provide cushioning | Surface texture and dimensional detail may not suit every brand |
| Foam insert | Sensitive products requiring close cushioning | Effective for fragile or precision-shaped items | Material and end-of-life considerations should be assessed for the intended market |
| Fabric-covered or wrapped insert | Luxury gifting and delicate presentation | Soft visual finish and elevated feel | More complex to produce and may complicate assembly or material separation |
Match retention method to product behaviour
An insert can hold a product through shape, friction, mechanical features or secondary materials. Common retention approaches include:
- Die-cut cavities: Suitable for predictable product shapes and straightforward loading.
- Folded side walls: Useful for separating products in board inserts.
- Locking tabs: Helpful for keeping smaller accessories from lifting out.
- Paper straps or bands: Can secure soft goods, tubes or objects with variable width.
- Top pads: Limit vertical movement under the lid.
- Sleeves and wraps: Protect surfaces before an item enters the main cavity.
- Adhesive dots or removable tabs: May work for selected items, but must be tested for residue, surface damage and repeatability.
- Ribbon ties: Best used as a presentation or lifting feature rather than the only restraint for heavy products.
For items containing liquids, powders or food, consider what happens if a component leaks or breaks. An insert can improve separation, but it may not be sufficient as the sole containment measure. Confirm any product-specific packaging, labelling and handling requirements before finalising the set.
Consider the outer box and insert together
The insert cannot compensate for an unsuitable outer box. Its depth, opening style, board strength and internal dimensions must work with the selected insert and packed products.
Before finalising the structure, check:
- Whether the lid closes without pressing on products
- Whether the packed set has headspace where required
- Whether the insert can be loaded without deforming
- Whether the box is stable when stacked or displayed
- Whether the opening mechanism gives clear access to the planned reveal
- Whether external wrapping, mailer packaging or retail handling changes the protection needs
For ideas on how the structural and presentation choices work together, review custom gift packaging options alongside the insert layout.
Trial kitting and removal
A physical packing trial is essential before committing to a production configuration. A digital layout can show approximate fit, but it cannot reliably reveal assembly delays, awkward grips, product movement or unexpected pressure points.
Trial kitting should use representative products in their final packing condition. Include labels, caps, wraps, inserts, leaflets and any seasonal accessories—not substitute objects with different dimensions or surface finishes.
Run a practical trial process
Use a repeatable sequence:
- Assemble the outer box and insert.
- Load every product in the intended order.
- Add printed pieces, protective layers and closure elements.
- Close the box without forcing the lid.
- Lift, tilt and gently handle the packed set.
- Open it as a customer would.
- Remove each item without using excessive force.
- Repack the set to check whether the insert retains its shape.
- Repeat the process with several units.
During the trial, record the issues rather than relying on memory. Typical findings include a cavity that is too tight after wrapping, a leaflet that buckles under the lid, ribbon pulls that slip beneath a tray, or an accessory that becomes hidden under tissue.
Test the pack-out process, not only the finished display
A set that looks excellent in one hand-packed sample may be impractical at volume. Observe the number of touches required to assemble it and identify steps that require precise alignment, separate tools or difficult handling.
Ask these questions:
- Can staff identify each component quickly?
- Is there a clear loading order?
- Can products be loaded without damaging printed surfaces?
- Are left and right orientations obvious?
- Can a missing item be spotted before closing?
- Does the insert stay flat and square during loading?
- Are there loose components that could be missed?
- Is the finished configuration easy to inspect?
If kitting will occur at a different site from box manufacture, allow for realistic storage, handling and transport conditions. Flat-packed inserts may reduce space before assembly, while pre-assembled trays may make kitting faster. The better option depends on the set’s complexity and the available packing process.
Document set configuration and pack-out
Once the insert passes trial kitting, document the approved configuration. This protects consistency when a set is reordered, a new team member joins the packing line, or a seasonal variation is introduced.
A useful pack-out document should include:
- Set name, version number and date
- Outer box and insert identifiers
- A complete component list with SKUs
- Product quantities and approved substitutions, if any
- Product orientation notes
- Loading order, ideally with simple images or diagrams
- Details of tissue, sleeves, cards, ribbons and seals
- Instructions for checking closure and presentation
- Notes on fragile or surface-sensitive items
- Carton packing instructions where relevant
- A change-control section for revised components or dimensions
Keep a master sample
Retain an approved physical sample where practical. It provides a direct reference for colour, orientation, assembly and overall presentation. The sample should be updated whenever products, labels, dimensions, insert materials or printed components change.
Even minor changes can affect fit. A new cap, thicker leaflet, different bottle label or revised accessory can alter the space required inside the box. Recheck the insert whenever a component changes rather than assuming the existing layout will remain compatible.
Common multi-item gift box insert mistakes
Avoiding a few frequent errors can save substantial rework:
- Designing around product dimensions before listing all pack-in materials
- Leaving insufficient room for labels, wraps, caps or protective sleeves
- Making cavities so tight that items are hard to remove
- Allowing heavy products to rest against fragile ones
- Using an insert that only works for one SKU variation without documenting it
- Adding layers without planning a practical lift or removal feature
- Selecting materials for appearance alone rather than load and handling requirements
- Reviewing a display sample but not trialling the actual kitting process
- Omitting an illustrated pack-out guide for complex sets
- Changing a component without checking insert compatibility
FAQ
How much clearance should a gift box insert have?
There is no single allowance that suits every product. Clearance depends on product tolerance, insert material, wrapping, item weight and the degree of retention needed. Use actual finished samples and trial packing to establish a cavity that can be loaded and removed easily without allowing harmful movement.
Can one insert be used for several product variations?
Yes, if the product dimensions and shapes are close enough to retain each variant properly. For more substantial differences, use spacers, interchangeable insert sections or separate insert versions. A visibly loose cavity can undermine both protection and perceived quality.
Are layered gift box inserts harder to pack?
They can be. Each extra layer adds handling, alignment and inspection steps. Use layers when they materially improve presentation, product protection or box footprint—not simply because they look more elaborate in a mock-up.
What is the best insert for heavy gift set items?
The right option depends on the item shape and total set weight. Rigid board platforms, reinforced folded inserts and corrugated structures can all be appropriate. Test the insert with the actual products, including handling and closure, before selecting a final structure.
A successful multi-item gift box starts with a documented set configuration, a logical reveal sequence and an insert that has been trialled under real packing conditions. Use your component list and layout map as the basis for a packaging brief, then review the physical sample before approving the final pack-out.
