
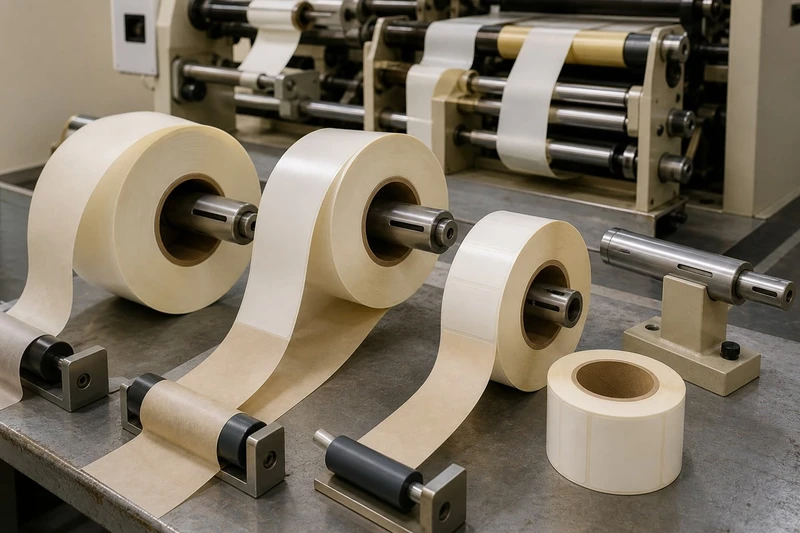
Choosing the right label roll unwind direction and core size is essential for smooth application. Your labels must enter a dispenser or labelling machine in the correct orientation, on a roll that physically fits its spindle and roll holder. A mismatch can cause upside-down labels, poor dispensing, web breaks, sensor faults and production stoppages.
For a reliable specification, confirm how labels will be applied first, then provide the equipment’s unwind diagram or state the direction using a clear reference. Also specify the core internal diameter, maximum outside roll diameter, label orientation, gap, splice allowance and packing requirements. Do not assume that a direction number alone means the same thing across every supplier or machine.
Confirm hand or machine application
The application method determines how tightly you need to control the roll specification.
For hand-applied labels, the main considerations are convenient roll handling, label size, adhesive performance and whether the labels will be peeled from the liner individually. A compact roll may be easier for staff to use at a packing bench, while a larger roll can reduce changeovers where there is a fixed dispenser.
For machine application, every roll detail matters. The label must feed through the machine without twisting, reach the peel plate in the correct position and present the leading edge correctly to the product. Before ordering, identify:
- The labelling machine make and model, if known
- Whether labels apply to bottles, jars, pouches, cartons, tubs or another pack format
- The application position: front, back, wrap-around, top, bottom or seal
- Whether the machine feeds the web from above, below, left or right
- The location and direction of the unwind spindle
- The label sensor type and whether it detects gaps, marks or liner characteristics
- The maximum roll weight, roll diameter and core size accepted by the machine
- Whether the applicator uses a rewind unit, and its core requirements
A machine manual or existing job specification is normally the safest source. If an existing label roll works well, photograph the roll in the machine and record its dimensions before changing suppliers, label size or winding arrangement.
Hand application: choose for practical handling
Hand-applied label rolls have more flexibility, but they still need a sensible format. Consider:
- Roll diameter: Smaller rolls are lighter and easier to hold; larger rolls reduce replenishment.
- Core size: Select a core that fits the dispenser, if one is used. A roll can be hand-applied without a core-mounted dispenser, but an unsuitable core may make the roll difficult to control.
- Unwind: Make sure the label is easy to peel in the intended direction. This is particularly helpful for labels with a clear “top”, product imagery or variable data.
- Label orientation: A portrait label may be easier to apply from one edge; a landscape label may suit another workflow.
- Adhesive exposure: For manually applied labels, allow enough liner tab or peelable edge for operators to separate the label cleanly.
For simple applications, ask for a sample roll or a short production trial where practical. This is especially worthwhile for small labels, transparent materials and labels applied around curved containers.
Machine application: follow the equipment specification
With automatic or semi-automatic labelling, the machine’s documented configuration takes priority over general conventions. A direction that works on one applicator may be wrong on another, even when both machines label similar products.
Provide the printer with one of the following:
- The machine manufacturer’s label roll specification or winding chart;
- A diagram showing the roll position, feed path and label face;
- A retained sample roll marked “this orientation works”; or
- A completed roll-specification form that uses the printer’s own unwind reference system.
Avoid relying on verbal descriptions such as “labels coming off the top”. They can be interpreted differently depending on whether the viewer is looking at the roll face-on, from the operator side or from the unwind side.
Identify unwind direction
Label roll unwind direction describes the way the label web leaves the roll. It controls whether the label appears upright, sideways or inverted as it travels through a dispenser or labeller.
There is no single universal numbering system. Some suppliers use numbered unwind positions; others use clock-face diagrams, “face in” or “face out” terminology, or their own winding illustrations. Therefore, a request for “unwind direction 3” without the relevant diagram can result in an incorrect roll.
The safest approach is to specify direction visually and confirm it in writing.
Use a complete direction description
A robust label roll unwind specification includes all of the following:
- Label face: Is the printed face wound inwards towards the core, or outwards?
- Feed edge: Which edge leads first as the label moves towards the peel plate?
- Label position: Is the top of the design leading, trailing, left or right?
- Roll viewing position: State how the roll is being viewed in the diagram.
- Machine feed path: Show whether the liner feeds over or under rollers, where relevant.
- Printer’s reference diagram: Circle or identify the exact unwind direction on the supplier’s chart.
For example, “labels face out, artwork top edge leading, supplied to match attached applicator diagram” is much less ambiguous than “top unwind”.
Why label face in or face out matters
“Face in” means the printed labels are wound towards the core, with the liner facing outwards. “Face out” means the printed label surface is on the outside of the wound roll.
Neither option is automatically better. The right one depends on the route through the applicator and the point where the liner separates from the label at the peel plate.
Face orientation can also matter for thermal-transfer overprinting, inspection cameras and manual dispensing. If variable information must print on the label face before application, the printer arrangement may require a specific web orientation.
Leading edge and artwork orientation
The leading edge is the first edge of each label to reach the peel plate or application point. It is not necessarily the top of the artwork.
For a label with a readable front, state how it should arrive at the product:
- Top edge first: often used when labels apply downward or around a container from a defined starting point.
- Bottom edge first: may suit a different peel-plate arrangement.
- Left edge first or right edge first: common with landscape labels and side-fed systems.
Artwork orientation is particularly important for:
- Ingredient panels and barcodes
- Directional designs and logos
- QR codes that must remain readable
- Labels with a defined opening or tamper feature
- Multiple labels applied to one product in sequence
If a label is rotationally symmetrical, unwind orientation may be less critical visually, but it can still affect machine compatibility.
A simple way to avoid an unwind error
Before approving production, make a one-page visual brief. Include:
- A photo or sketch of the product in its application position
- A picture of the roll mounted on the machine
- An arrow showing web travel
- A label image with “TOP” clearly marked
- The required leading edge
- The supplier’s unwind chart with the chosen option highlighted
This document gives production, procurement and operators a shared reference. It is more useful than relying on someone’s memory when repeat orders are placed months later.
Specify core size and maximum roll diameter
The core is the cardboard or plastic centre of the roll. Core size usually refers to its internal diameter (ID), which must fit over the labelling machine’s spindle or the dispenser’s hub.
Common core sizes are often expressed in millimetres or inches, but you should always state the measurement explicitly. For example, 76 mm (3 inch) and 25 mm (1 inch) are distinct formats. A core that is too small will not fit the spindle; one that is too large may slip, sit off-centre or fail to engage with the roll holder.
Maximum roll diameter is the allowable outside diameter (OD) of the fully wound roll. It affects whether the roll fits inside a dispenser, machine guard or unwind bay.
| Specification | What it means | Why it matters |
|---|---|---|
| Core internal diameter | The hole through the centre of the roll | Must fit the machine spindle or dispenser hub |
| Maximum roll outside diameter | The full diameter of the wound roll | Must fit within guards, holders and available clearance |
| Roll width | Width of the liner web, including labels and margins | Must suit guides, sensors and feed rollers |
| Maximum roll weight | Weight the unwind system can support | Excess weight can affect tension and reliable feeding |
| Winding tension | How firmly the labels and liner are wound | Too loose or too tight can create feeding or dispensing problems |
Core size: measure rather than estimate
If you do not have the machine specification, measure the spindle or an existing core:
- Remove the empty core from a roll that has run correctly.
- Measure the hole through its centre, not the outside of the cardboard tube.
- Record the result in millimetres.
- Check whether the core has a particular width, locking notch or end-disc arrangement.
- Confirm the required core material if the equipment documentation specifies it.
The nominal core size should not be guessed from a ruler held against the outside of a finished roll. The actual internal diameter is the critical measurement.
Maximum roll diameter affects run time
A larger roll can hold more labels and reduce operator changeovers. However, it is only beneficial if the equipment has room for it and can handle its weight and rotational inertia.
The number of labels per roll depends on several factors:
- Label length in the direction of travel
- Gap between labels
- Liner thickness
- Label material thickness
- Core diameter
- Maximum outside roll diameter
- Any required leader and trailer length
As a result, two rolls with the same outside diameter can contain different label counts. Do not specify labels per roll alone if your machine has a firm diameter limit. State both the required count or approximate count and the maximum outside diameter.
Allow for equipment guards and roll clearance
A roll may fit onto an exposed spindle but still foul a machine guard, sensor arm or unwinding bracket. Confirm clearance with the guard closed and consider the widest part of the wound roll, not just the core.
Where multiple production sites or co-packers use the same labels, check every machine. The most restrictive compatible requirement may need to govern the roll format, or separate roll specifications may be needed.
Set label gap and orientation
The label gap is the space between labels on the liner in the direction of travel. It is a key input for automatic labelling because the machine needs to identify where one label ends and the next begins.
A gap that is too small can make sensing difficult. A gap that is too large may reduce the number of labels per roll and can affect the machine’s timing. The correct gap depends on the label material, sensor type, application speed and equipment settings.
Specify:
- The gap measurement in millimetres
- Whether the gap is measured edge-to-edge between labels
- The label width and length
- The web width, including side margins
- The label orientation on the web
- Any registration mark requirements for special sensing systems
Match the gap to the sensor
Many labellers use a sensor to detect the gap in the liner. Clear labels, metallic films, dark liners and unusual materials can be more challenging for some sensor arrangements. In those cases, a machine may use a different sensing method or require a registration mark.
Do not change from paper to clear film, or alter the liner type, without checking the effect on sensing. A roll can be the right size and unwind direction yet still fail to dispense consistently because the sensor cannot reliably detect each label.
If the machine manual identifies a minimum gap, follow it. If it does not, retain the proven gap from a currently working roll where possible.
Set orientation with the product application in mind
Label orientation describes how the artwork sits relative to the direction of travel. It should be chosen for both visual presentation and machine movement.
For example, a label applied to the front of a bottle may need its top edge to meet the bottle first so it lands squarely. A wrap-around label may need a particular leading edge to align a barcode, seam or panel with the container’s front.
Check the following before finalising artwork:
- Is the barcode located away from a tight container curve or overlap area?
- Will the label start and finish at the intended points on a round pack?
- Does the artwork remain upright at the point of application?
- Is the leading edge suited to the applicator’s wipe-down brush, roller or belt?
- Does any variable print area reach the printer head in the correct orientation?
For more general material, shape and finish choices, review the available custom sticker and label options alongside the roll-format requirements.
Check splice roll count and carton needs
A splice joins two sections of label web together. Splices can be necessary in roll production, but they may interrupt automatic labelling and require an operator to stop or remove a short section of labels.
If a continuous unattended run is important, state the maximum number of splices permitted per roll. Also ask how splices will be marked, so operators can identify them before they reach the applicator.
Set a practical splice requirement
There is a trade-off between roll length, material efficiency and splice tolerance. Requiring no splices at all may not be practical for every job, material or roll length. The useful question is not simply “are there splices?” but:
- How many splices are allowed per roll?
- Are splices allowed on all rolls or only under defined conditions?
- How will each splice be marked?
- Is there a minimum distance from the start or end of the roll?
- Will spliced labels be counted as usable labels?
- Can the labelling line stop safely when a splice approaches?
For high-speed production, a clear splice policy can prevent unexpected downtime. For hand application, a splice may be less significant, provided it is visible and does not damage labels.
Choose a useful labels-per-roll count
The ideal count balances changeover time against roll handling. Consider:
- How many labels are used per production batch
- Whether the line can pause for a roll change
- Available space in the unwind area
- Operator lifting and handling limits
- Whether partial rolls create stock-control complications
- The maximum roll diameter and weight the equipment accepts
For example, a roll count that aligns with a standard batch size may simplify reconciliation, but only if it remains within the labeller’s physical limits. Specify a target count, with an acceptable tolerance if appropriate, rather than assuming every roll will contain an identical number of labels.
Define carton packing requirements
Carton requirements help protect roll edges and make warehouse handling easier. Confirm:
- Number of rolls per carton
- Whether rolls are individually bagged or otherwise protected, if required
- Maximum carton weight for safe handling
- Carton labelling details, such as job name, label version, roll count and roll sequence
- Whether carton quantities need to match production batches
- Whether rolls must be packed upright, flat or in another defined position
For labels with dark, metallic, high-gloss or easily scuffed surfaces, suitable handling and protection requirements should be discussed as part of the job specification. Avoid assuming that every label construction has the same resistance to abrasion or edge damage.
Validate the final roll specification
The best time to find a roll incompatibility is before the full order is produced. Validate the finished specification against the machine, product and artwork—not against one requirement in isolation.
Use this final checklist before approving a label order:
- [ ] Application method is confirmed: hand, dispenser, semi-automatic or automatic machine.
- [ ] Machine make and model, or a working-roll sample, has been provided where available.
- [ ] Unwind direction is identified using the supplier’s diagram.
- [ ] Label face is stated as face in or face out.
- [ ] Leading edge and artwork “top” orientation are clearly marked.
- [ ] Core internal diameter is specified in millimetres.
- [ ] Maximum outside roll diameter is stated.
- [ ] Web width and label dimensions are confirmed.
- [ ] Label gap is defined and compatible with the sensor.
- [ ] Material and liner changes have been checked for sensing and dispensing effects.
- [ ] Labels-per-roll target and allowable tolerance are agreed.
- [ ] Splice allowance and marking requirements are documented.
- [ ] Carton quantity, labelling and handling needs are recorded.
- [ ] A sample roll or production trial is considered for new machinery, materials or formats.
Common specification mistakes to avoid
The most frequent issues are preventable:
- Using an unwind number without the matching diagram. Direction numbering is not universal.
- Specifying core diameter but not maximum roll diameter. The roll fits the spindle but not the machine enclosure.
- Giving finished label size only. The supplier also needs the web width, gap and orientation.
- Assuming a current roll can be copied after artwork changes. A different label length or material can alter roll diameter and count.
- Changing film or liner without reviewing the sensor. Gap detection may change substantially.
- Ignoring the leading edge. Labels may apply upside down or arrive at the applicator in the wrong orientation.
- Failing to define splice handling. A production line can stop unexpectedly at an unmarked join.
- Approving without a visual reference. Written descriptions alone leave room for interpretation.
FAQ
What is the standard label roll unwind direction?
There is no universal standard. The correct label roll unwind direction is the one required by your dispenser or labelling machine. Always use the equipment documentation or the printer’s unwind chart rather than relying on a direction number from another supplier.
How do I find the core size for my label roll?
Check the labelling machine specification or measure the internal hole of an empty core from a roll that fits correctly. Record the internal diameter in millimetres. Also check the roll holder for any locking, flange or width requirements.
Can I use a larger label roll if it has the same core size?
Not necessarily. The core may fit, but the outside diameter, weight or width can exceed the machine’s capacity. Confirm all three dimensions and any maximum roll-weight limit.
Does label gap matter for hand application?
It matters less than it does for automatic application, but it still affects how easily labels peel from the liner and how many labels fit on a roll. For machine use, the gap is critical for reliable sensing and timing.
Should I order a sample roll for a new label format?
A sample roll or controlled trial is prudent when changing label material, shape, size, liner, unwind direction or applicator. It is particularly valuable for clear labels, complex shapes, high-speed equipment and wrap-around applications.
A complete roll specification turns label ordering from an assumption into a repeatable production requirement. Gather the machine details, document the unwind visually and confirm physical roll limits before approving artwork. When requesting custom labels from XGolden Print, provide this information with the artwork so the roll format can be reviewed against your intended application.
