
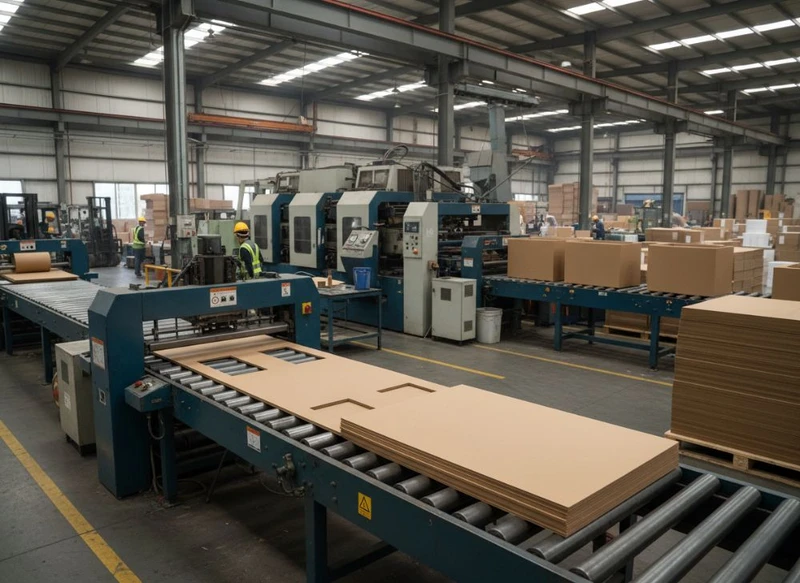
Custom paper boxes move through a controlled sequence: paperboard is selected and prepared, printed, die-cut and creased, then folded, glued, assembled where needed and inspected before packing. The exact workflow changes with the box style, artwork, finish, quantity and whether the pack is machine-assembled or made by hand.
For Australian brands and packaging buyers, understanding this process makes it easier to write a usable specification, compare suppliers fairly and identify decisions that affect appearance, assembly speed and product protection. This guide takes you inside the factory: how custom paper boxes are made from sheet to shelf, with practical checks to make before approving production.
The Paperboard Manufacturing Process
The process begins with the substrate: a paperboard sheet chosen to suit the product, print design and intended retail environment. A folding carton for cosmetics, for example, needs different stiffness and surface qualities from a mailing carton or a rigid gift box.
Paperboard may be supplied as coated board for detailed colour printing, uncoated board for a natural look, kraft-style board for a more rustic presentation, or specialty board selected for a particular finish. The material is normally supplied as large sheets, then conditioned and prepared for the print and converting stages.
Key choices at this stage include:
- Board type: Determines the surface appearance, feel and print receptiveness.
- Board thickness and stiffness: Influences how well the box holds its shape and protects the contents.
- Grain direction: Affects folding behaviour. Folding against an unsuitable grain can increase the chance of cracking or uneven creases.
- Sheet size: Needs to work efficiently with the press, die layout and finished box dimensions.
- Colour and surface: Bright white, natural, coloured and textured stocks can all change how printed artwork appears.
- Recycled-content or fibre claims: If these claims will appear on-pack, confirm the supporting documentation and wording before print approval.
A box is not automatically stronger because it uses thicker board. A poorly designed structure, unsuitable fold direction or heavy product can still lead to panel bowing, split corners or weak closures. Product weight, dimensions, handling conditions and stacking requirements should be considered together.
For products that are sensitive to scuffing, moisture, migration or direct contact with contents, buyers should identify those requirements early. Material suitability, inks, coatings and any market-specific compliance obligations must be confirmed for the finished application rather than assumed from the board name alone.
What to provide when specifying board
A useful packaging brief includes the packed product dimensions and weight, desired box style, use environment, preferred appearance, artwork requirements, finish preferences and any special handling needs. If you have an existing sample, identify which features are essential and which can change to improve manufacturability.
The Die-Cutting and Creasing Phase
After printing, or sometimes before printing depending on the job, sheets go through die-cutting and creasing. This is the stage that turns a flat printed sheet into a box blank with the correct outer profile, panels, flaps, tabs and fold lines.
A cutting die is made to match the structural layout. It contains cutting rules to create the outer shape and internal openings, plus creasing rules that compress the board along planned fold lines. Waste material around the blank and inside cut-outs is removed during stripping.
The die line must account for more than the visible box shape. It needs to include practical production features such as:
- Glue tabs and glue-free areas
- Locking tabs, tuck flaps or crash-lock bases
- Windows, hang holes or display cut-outs
- Bleed areas for printed artwork
- Safe zones to keep text away from cuts and folds
- Crease positions that support reliable folding
- Allowance for board thickness and product fit
A structural design can look correct as a flat drawing but fail when folded. For this reason, a physical prototype or plain sample is valuable for new formats. It helps check product fit, opening action, label placement, closure security and the way the box sits on a shelf.
Die-cutting issues buyers should watch for
Fine detail can be technically possible but unsuitable for high-volume conversion. Very narrow bridges, intricate cut-outs, tiny tabs and tight internal corners may slow production or create fragile areas. Similarly, heavy ink coverage across a fold can make cracking more noticeable, especially when the board is folded sharply.
Before approving artwork, ask to see the dieline and confirm:
- Which lines are cuts, creases, perforations and glue areas.
- Whether barcodes, small text and legal copy remain clear of folds and seams.
- Whether important design elements align across joined panels.
- How the product will be loaded and closed.
- Whether the empty box can be supplied flat or needs assembly before use.
Printing and Finishing Techniques
Printing brings the visual identity of the pack to life. The best method depends on artwork complexity, colour expectations, substrate, order quantity and the finish required. Rather than choosing a process by name alone, start with the expected result: accurate brand colours, photographic detail, a natural uncoated appearance, metallic highlights or a premium tactile surface.
Common print and finishing options include the following.
| Technique | Best suited to | Buyer considerations |
|---|---|---|
| Offset printing | Detailed artwork, solid colour areas and consistent branded designs | Requires careful artwork preparation and colour approval |
| Digital printing | Shorter runs, versioned designs and variable information | Confirm colour expectations and material compatibility |
| Flexographic printing | Some simpler, repeat packaging applications | Discuss artwork detail, substrate and finish requirements |
| Lamination | Added surface protection or a particular gloss, matt or soft-touch effect | Can change recyclability pathways and the feel of the pack |
| Spot UV | Highlighting logos, patterns or selected graphic details | Contrast is most noticeable against a matt or uncoated-looking surface |
| Foil stamping | Metallic decorative elements | Fine detail and placement tolerances should be reviewed |
| Embossing or debossing | Raised or recessed tactile details | Works best when the board and artwork leave enough space around the feature |
| Window patching | Allowing customers to view the product | Confirm the window material, attachment method and end-of-life considerations |
Finishing should support the job of the packaging, not merely decorate it. A high-gloss finish can make colours appear more vivid, while a matt finish may better suit a restrained or premium design. However, dark solid areas and unprotected surfaces can show handling marks more readily. The likely sales setting, fulfilment method and expected customer interaction all matter.
Artwork approval is a production checkpoint
The print-ready artwork should be checked against the approved dieline before files are released. In particular, review:
- Correct box panel order and orientation
- Bleed extending beyond cut lines
- Text and logos kept inside safe areas
- Barcode location, size and contrast
- Overprint, white ink and spot-colour instructions where applicable
- Foil, emboss, varnish and window layers separated clearly
- Image resolution appropriate for final print size
- Version control for ingredients, product information or regional variants
A screen proof is useful for content review, but it cannot always represent the final look on a specific board with a particular finish. Where colour or surface appearance is critical, discuss the appropriate approval sample with the supplier.
For packs that also require product identification or sealing, custom printed stickers can be specified as a coordinated part of the wider packaging system. Consider where the label will sit, whether the box surface is coated and how the adhesive will perform during storage and handling.
Automatic Gluing and Folding Machines
Most standard folding cartons are assembled on automatic folder-gluer equipment. Die-cut blanks are fed into the machine, folded along their creases, adhesive is applied to the planned glue flap, and the box passes through a compression section so the bond can set.
This method is generally well suited to carton styles such as straight-tuck boxes, reverse-tuck boxes, sleeves, auto-lock bases and other structures designed for machine folding. The boxes are usually delivered flat-packed, helping businesses store and transport them efficiently before filling.
Automatic gluing relies on a well-engineered blank. Important design factors include glue-flap width, fold sequence, board stiffness, lock design and whether the finished box can travel through the machine without snagging. Not every decorative or highly complex structure is suitable for high-speed automated assembly.
Ask these questions when comparing a machine-glued carton with a hand-finished alternative:
- Will the box arrive flat or pre-erected?
- Who will form the box and insert the product?
- Does the base lock securely without additional tape?
- Are there glue areas that could interfere with product loading?
- Can the pack be assembled consistently by your fulfilment team?
- Does the product require an insert, divider or protective wrap?
A well-designed custom box balances visual presentation with efficient packing. A slightly simpler closure may reduce assembly time and handling errors without changing the customer-facing appearance.
Manual Assembly for Complex Gift Boxes
Complex gift packaging often requires manual assembly because the construction includes wrapped boards, separate lids, magnets, ribbons, partitions, shoulder-and-neck details or multiple decorative components. Rigid boxes are commonly built from thicker greyboard or similar structural board, then wrapped with printed or coloured paper.
Unlike a standard folding carton, a rigid gift box generally does not begin as one die-cut blank that folds into its final form. Components may be cut, wrapped, glued and aligned in stages. Inserts, ribbon pulls, tissue liners and magnetic closures can be added during or after assembly.
Manual work allows for more elaborate presentation but introduces additional points to define and inspect. For example:
- Lid and base alignment
- Corner wrap neatness
- Wrap paper overlap and edge finish
- Magnet position and closing action
- Ribbon placement and length
- Insert fit and orientation
- Consistency between assembled units
Complex presentation packaging should be sampled with the actual product, not only an empty box. A fitted insert can look excellent until the product changes slightly in size, gains an accessory or is wrapped differently.
For premium launches, hampers and presentation-led products, explore custom gift packaging with a clear brief covering the unboxing sequence, packed product dimensions and any components to be included.
Quality Checks and Inspection Points
Quality control is most useful when it happens throughout production rather than only at the end. The aim is to catch deviations while they can still be corrected, and to ensure the final packed product matches the approved specification.
Typical inspection points include:
Incoming material checks
The paperboard, wrap paper, adhesives and other components should match the job specification. Check the correct material, surface, colour and quantity before production proceeds.
Pre-production artwork and sample approval
Confirm the approved artwork version, dieline, colour references, finishing layers and physical construction. A written approval record helps prevent an outdated file or sample being used as the production reference.
In-process print and converting checks
During production, checks may cover print registration, colour consistency, legibility, die-cut alignment, clean stripping, crease quality and finish placement. The appropriate tolerances depend on the product and should be agreed where critical.
Assembly checks
For glued cartons and rigid boxes, inspect fold alignment, glue application, closure function, structural squareness, insert placement and visible presentation surfaces. Functional checks should reflect how the customer will open, close and use the packaging.
Final packing checks
Before dispatch, review count, packing configuration, carton labels and protection against transit scuffing or crushing. If the goods are to be filled by another party, ensure the pack-out method allows safe handling and straightforward identification.
Common faults to discuss before production include colour variation, print scuffs, cracked folds, exposed unprinted edges, loose glue seams, misaligned foil, uneven embossing, poorly stripped waste and boxes that do not open or close cleanly.
Quality expectations should be written in clear, observable terms. “Premium quality” is subjective; “logo centred on the front panel, closure operates without tearing, and printed text remains legible after folding” is more actionable.
Global Sourcing and Logistics Challenges
A packaging factory may be capable of producing an excellent box, yet sourcing still involves commercial and operational risks. Australian buyers should assess the full path from approved artwork to their packing bench or retail storage area, particularly when production and filling occur in different locations.
Common challenges include:
- Long approval cycles: New structures, print finishes and colour-sensitive work can require multiple rounds of review.
- Communication gaps: Ambiguous dimensions, missing dielines or unclear material descriptions can produce the wrong result.
- Freight volume: Lightweight boxes can occupy substantial space once assembled; flat-packed formats can reduce storage and transport volume.
- Transit damage: Corners, coated surfaces and rigid box wraps may need suitable outer protection.
- Split deliveries or consolidation: Packaging components may need to arrive together, particularly where cartons, inserts and labels are used in one packing process.
- Inventory planning: A design change can leave older packaging unusable, so avoid ordering more than the product forecast supports.
- Imported material assumptions: Confirm the actual material composition, documentation and suitability for your intended market and use.
Do not treat an overseas or distant supplier as interchangeable with a local stock item. Build time into the plan for sampling, artwork revision, production, freight, receiving inspection and contingency stock. Also clarify the commercial scope: what is included in the quoted pack-out, whether samples are representative of final production, and who is responsible for checking goods on arrival.
A useful supplier comparison should cover more than unit cost. Compare the structural proposal, material description, print process, finishing method, sampling approach, packing method, lead-time assumptions, minimum order quantity and communication process.
Innovation in Paper Box Production Technology
Technology is improving how packaging is designed, printed, converted and checked. For buyers, the most useful innovations are those that reduce avoidable errors, enable clearer brand communication or improve the fit between a box and its product.
Current production developments can include:
- Digital prototyping: Faster visual and structural review before committing to tooling.
- Variable-data printing: Packaging versions with different names, codes, languages or campaign details.
- Automated inspection systems: Camera-based checks for selected print, registration or defect criteria.
- More efficient nesting: Dieline layouts designed to use sheet area more effectively.
- Digital workflow management: Better control of artwork versions, approval records and production files.
- Material development: New board, coating and fibre-based options that should be assessed against the required performance and end-of-life pathway.
Innovation does not remove the need for physical testing. A digital 3D visual can help stakeholders understand shape and graphics, but it cannot fully confirm tactile feel, fold response, product fit or real-world handling. For a new pack, prototype first, test it with the actual product and then approve the production specification.
A practical checklist before ordering custom boxes
Before releasing a purchase order, make sure you can answer the following:
- What are the product’s final packed dimensions and weight?
- Is the packaging for retail display, e-commerce dispatch, gifting or a combination?
- Which box style best suits loading, closing and customer opening?
- What board, finish and colour result are required?
- Does the design include features that need manual assembly?
- Has the artwork been checked against the final dieline?
- Have product fit, barcode placement and closure function been tested?
- Are labels, inserts and other components included in the packing plan?
- What quality checkpoints and acceptance criteria need to be agreed?
- How will boxes be stored, assembled and filled after delivery?
- What market-specific material, labelling or compliance requirements must be verified?
Understanding each stage helps you choose a specification that is attractive, practical and repeatable. XGolden Print has 27 years of packaging experience and a production team of more than 500 employees; when assessing any packaging partner, use a detailed brief and approved sample to keep the finished result aligned with your requirements. To start planning, review the available custom packaging options and turn your product, artwork and handling needs into a clear box specification.
