
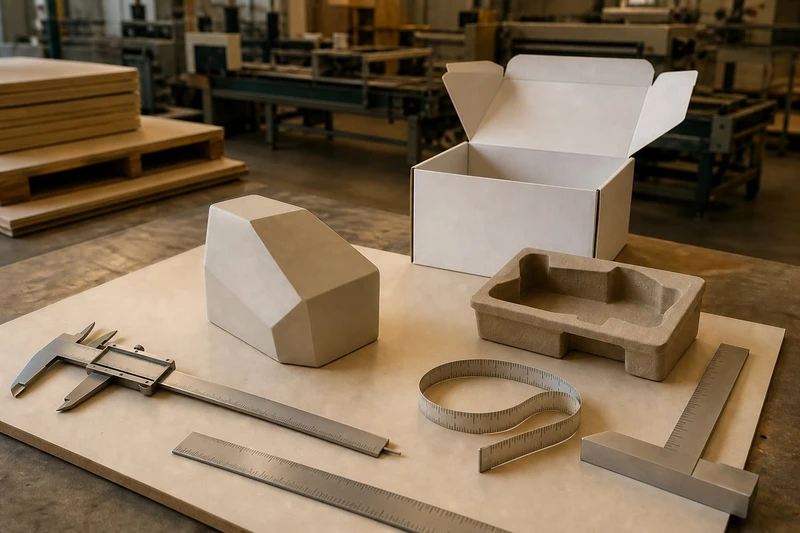
To measure a product for a custom box, record its maximum length, width and height in millimetres, then add the space required for wrapping, protective inserts and easy removal. Give the box supplier the resulting internal dimensions in the order L × W × H, and confirm how they define each dimension before production.
The most reliable approach is to measure the product in its final packed state—not just the bare item. A box that fits the product perfectly on paper may be too tight once a polybag, tissue, foam insert, cable, lid, or tamper seal is added.
Choose the correct measurement tools
Use tools that suit the product’s size, shape and required accuracy. For most packaging projects, measurements in millimetres are clearer and more useful than centimetres.
| Tool | Best use | Watch for |
|---|---|---|
| Steel ruler | Small, flat or rectangular products | Can be inaccurate around curves and protrusions |
| Tape measure | Larger products, garments and soft goods | Keep it straight; avoid reading from a bent tape |
| Digital callipers | Small items, jewellery, cosmetics, components and precise features | Measure gently so you do not compress the item |
| Contour gauge | Curved, irregular or shaped products | Useful for understanding profile, not a substitute for overall dimensions |
| Scales | Shipping estimates and material selection | Weight does not determine box dimensions, but affects board and insert choices |
| Sample wrapping materials | Products packed in tissue, bags, sleeves or bubble wrap | Measure the packed product, not the product alone |
Before measuring, set up the item as it will be sold. Include any standard accessories, user manuals, chargers, protective sleeves, labels, seals and internal packaging components that will share the box.
For a product with several components, decide whether all pieces will sit in one compartment, separate cavities or stacked layers. This decision changes the required box dimensions substantially.
Record maximum dimensions and irregular features
Measure the product at its widest, longest and tallest points. Do not rely on catalogue dimensions or nominal product sizing, especially where the item has handles, caps, seams, feet, buttons, hinges or uneven surfaces.
Use this sequence:
- Place the product in the orientation it will have inside the box.
- Measure the longest side: this is normally the length.
- Measure the perpendicular side: this is the width.
- Measure from the lowest point to the highest point: this is the height.
- Repeat each measurement at least once to check for variation.
- Record the largest result, rounded sensibly for the packaging specification.
Write dimensions consistently as:
Product dimensions: L × W × H mm
For example:
185 × 95 × 42 mm
Identify features that change the real footprint
A product may appear rectangular but need more space than its main body suggests. Record these details separately on your packaging brief:
- Raised lids, pumps, droppers or spray heads
- Handles, straps, buckles and loops
- Rounded shoulders or tapered bases
- Uneven seams, stitching or decorative trims
- Fragile corners, screens or protruding controls
- Cables, plugs or accessories placed beside the product
- Parts that move, fold out or require a fixed position
- Orientation requirements, such as “this side up”
For a cylindrical bottle, jar or candle, measure the largest diameter—not the narrowest body section. For a tapered item, measure both the maximum width and the base width. This helps determine whether a standard folded carton, tray, insert or shaped cavity will be suitable.
Measure soft and compressible products differently
Soft goods can be misleading because their dimensions change with folding and compression. Apparel, fabric accessories, pillows, pouches and flexible kits should be measured in their intended folded presentation.
Do not specify a very tight box based on compressed dimensions if the product needs to look full and neatly presented after packing. Measure one properly folded sale-ready item, including tissue or a garment bag where applicable.
For multiple soft items, create a representative bundle first. Measuring one item and multiplying the height can produce an inaccurate result because folded edges, air and fabric thickness do not stack evenly.
Allow for protective wrapping and inserts
The box must contain the packed product assembly, not only the product. Add the thickness of every layer that will sit between the product and the box wall.
Common additions include:
- Tissue paper or glassine
- Polybags and shrink sleeves
- Bubble wrap or foam wrap
- Cardboard pads and divider walls
- Foam, moulded pulp or corrugated inserts
- Paper shred, void fill or cushioning
- Product manuals, cards and vouchers
- Tamper seals, labels and ribbon
- Magnetic closures or presentation trays
A simple working formula is:
Required internal box dimension = maximum packed product dimension + clearance + insert or protection allowance
Apply the formula to all three directions: length, width and height.
For example, a boxed skincare set measures 180 × 110 × 45 mm after being placed in a protective sleeve. If it needs 3 mm clearance around the sides and a 2 mm top-and-bottom allowance for a card insert, the approximate internal box size could be:
- Length: 180 + 6 = 186 mm
- Width: 110 + 6 = 116 mm
- Height: 45 + 4 = 49 mm
The final specification would be 186 × 116 × 49 mm internal.
This is an example only. The right allowance depends on the packing method, product fragility, box style, board thickness, insert design and how quickly staff need to pack the product.
Consider the insert before finalising the box
An insert often controls the fit more than the outer box does. A foam or card insert takes up internal volume, while its cut-out must match the product profile closely enough to restrain movement without making removal difficult.
Specify the following when an insert is planned:
- Product dimensions at the contact points
- Which surfaces can safely touch the insert
- Any areas that must not be compressed
- Required product orientation
- Whether the product needs finger access for removal
- The insert material and approximate thickness
- Whether accessories need separate cavities
Do not choose the box dimensions first and assume an insert can simply be added later. A well-designed insert, particularly for fragile or premium presentation packaging, should be planned alongside the box structure.
Plan tolerances without guessing
Tolerance is the intentional space between the packed product and the inside of the box. It is not wasted space: it allows for material thickness, normal production variation, packing speed and practical handling.
However, excessive tolerance can cause movement, scuffing and a poor unboxing experience. The goal is controlled clearance, not the largest possible box.
Start with the packing method
Use the packing method to set a reasonable allowance.
| Packing situation | Typical fit approach | Key consideration |
|---|---|---|
| Rigid rectangular product in a sleeve or folding carton | Close fit with modest clearance | Allow for board thickness, folds and easy insertion |
| Product wrapped in tissue | Slightly more room on all sides | Tissue bunches at corners and adds variable thickness |
| Fragile item with protective wrap | Generous protection allowance | Cushioning must remain effective after closing the box |
| Product held by an insert | Box fits the insert; insert fits the product | Check cut-out tolerances and removal access |
| Gift set with several pieces | Allocate defined compartments | Prevent pieces colliding during handling |
| Apparel or soft goods | Allow for natural bulk and presentation | Avoid over-compressing fabric or creating an empty-looking box |
There is no universal clearance value that suits every product. A small variation can be significant for a compact cosmetic carton, while a larger product wrapped in cushioning may need considerably more space.
Instead of selecting a tolerance from a generic rule, check:
- Is the product rigid, flexible or fragile?
- Can it be inserted from the top, side or an open tray?
- Is it hand-packed, or will repeat packing be done at volume?
- Does the product need to remain centred?
- Will wrapping thickness vary between packers?
- Could temperature or humidity affect the product, wrapping or board?
- Is a snug premium presentation more important than quick packing?
- Does the item need to survive an additional shipping carton environment?
Specify internal dimensions, then confirm external dimensions
When ordering a made-to-measure box, state clearly whether your dimensions are internal or external. For product fit, internal dimensions are usually the starting point because they describe the usable space inside the box.
External dimensions vary according to the box construction, board or paperboard thickness, folds, lining, wrap and any added components. This matters when boxes must fit into:
- Existing postal satchels or shipping cartons
- Retail shelving or display units
- Warehouse storage bins
- Fulfilment systems with size limits
- Gift hampers or subscription box formats
Ask the packaging supplier to confirm the finished external dimensions once the material and construction are selected. This avoids assuming that a 200 mm internal box will also measure 200 mm externally.
Check opening, assembly and removal
A box can have enough internal volume and still be difficult to pack or use. Test the complete packing path: how the product enters, how the box closes, and how the customer removes the item.
Check the opening size, not only the internal cavity
A tuck-end carton, mailer, drawer box or shoulder-and-neck rigid box may have an opening smaller than the available internal length or width. Corners, folded flaps and insert walls can reduce the practical entry space.
Check whether the product can be placed into the box without:
- Forcing it past folded flaps
- Catching corners on an insert
- Scraping printed or delicate surfaces
- Crushing tissue or protective wrapping
- Disturbing other items in a gift set
- Requiring awkward twisting or excessive handling
For a tight-fitting product, a top-loading box may work better than a side-loading style. Conversely, a drawer box or tray may improve presentation for products that are hard to lift from a deep carton.
Plan for easy removal
If a customer cannot remove the product comfortably, the packaging may feel poorly designed even when it protects the item well.
Useful removal features include:
- Finger notches in trays and sleeves
- Ribbon pulls beneath a product or insert
- Thumb cut-outs in drawer packaging
- A shallower insert cavity
- A lift-out platform or inner tray
- A separate accessory compartment
Take care with very deep boxes. Extra height may appear protective but can make a product difficult to grip. An insert, pull tab or different box style may be a better solution than simply increasing the box depth.
Consider the assembled box footprint
Flat-packed cartons must be assembled accurately. If the product is close to the box limits, small differences in folding, glue placement or insert assembly can affect the fit.
For retail and e-commerce teams, also confirm whether the packed box needs an outer shipper. The product box should not be expected to absorb every transport impact on its own unless the complete packaging system has been designed for that purpose.
Validate dimensions with a physical sample
A physical sample is the most dependable way to confirm that your dimensions work. Digital layouts, 3D renders and calculations are valuable, but they cannot fully show packing friction, material compression, lid tension, visual balance or the customer’s removal experience.
Before approving production, assemble a representative sample using the intended:
- Box style and dimensions
- Material or a close structural equivalent
- Insert or divider configuration
- Protective wrap and tissue
- Labels, seals and printed cards
- Full product set, including accessories
- Closure method
Use a practical sample-check list
Pack and unpack the sample several times. Check the following:
- Does the product enter without force?
- Is there noticeable rattle or movement?
- Does the box close cleanly without bulging?
- Are corners, lids and fragile features protected?
- Does the product sit straight and present well on opening?
- Can a customer remove it without damaging packaging or product?
- Is there enough room for all inserts and printed materials?
- Can staff pack it consistently without special handling?
- Does the outer box fit any planned mailer, shipper or retail fixture?
- Are the stated dimensions clearly identified as internal dimensions?
Where possible, test with products from different points in the normal size range. Hand-finished, soft, natural or assembled products may vary more than moulded or machined items. Designing only around the smallest sample can create packing problems later.
Common measurement mistakes to avoid
The most frequent errors are simple but costly to correct after artwork and tooling are approved:
- Measuring the bare product only
Protective sleeves, tissue and inserts can turn an apparently correct box into a tight fit.
- Using average measurements rather than the maximum
Packaging must accommodate the largest expected product, not the average unit.
- Mixing centimetres and millimetres
Record one unit consistently. For custom packaging specifications in Australia, millimetres are generally the clearest choice.
- Not stating the dimension order
Always use and label L × W × H. Do not assume every supplier interprets “width” and “depth” identically.
- Confusing internal and external dimensions
Internal dimensions determine fit; external dimensions affect shipping, storage and display compatibility.
- Ignoring the opening and removal path
A product may fit inside the cavity but not pass comfortably through the opening.
- Adding too much empty space
Oversized packaging can let products move, increase void-fill needs and reduce presentation quality.
- Skipping the physical sample
A sample often reveals issues that a dimension list cannot, including tight folds, crushed tissue and difficult removal.
A repeatable measurement template
Use this template when preparing a custom packaging brief:
| Item to record | Example |
|---|---|
| Product name and version | Glass candle, 300 g |
| Product orientation in box | Upright |
| Bare product dimensions | 82 × 82 × 95 mm |
| Packed product dimensions | 86 × 86 × 98 mm |
| Accessories included | Care card and dust cover |
| Protection required | Tissue wrap and card base pad |
| Insert required | No |
| Clearance requirement | Space for tissue and easy removal |
| Proposed internal box dimensions | 94 × 94 × 108 mm |
| Box opening and closure | Top-opening tuck carton |
| External-size constraint | Must fit within planned shipping carton |
| Sample checks | Fit, closure, movement, removal and presentation |
This format gives a packaging supplier enough context to assess whether the nominated size and structure are workable. It also makes it easier for procurement, product development and fulfilment teams to review the same specification.
Choosing a box style after measuring
The product dimensions are only one part of selecting packaging. The best structure depends on presentation, protection, packing method and how the box will be used after purchase.
A simple folding carton may suit a lightweight boxed retail product. A mailer may be more practical for e-commerce orders. A rigid gift box can offer a more premium presentation, particularly when paired with an insert. For an overview of available formats and options, explore XGolden Print’s custom packaging boxes.
When comparing options, provide the same measurement brief to each supplier. This makes it easier to compare recommendations based on the actual packed product rather than an incomplete set of external product dimensions.
FAQ
Should I measure the box or the product first?
Measure the product first, in its final packed condition. The product, wrapping, insert and accessories determine the internal box size. The external box size can be confirmed after the box material and construction are chosen.
How much bigger should a custom box be than the product?
There is no single correct amount. Add only the space needed for protection, inserts, normal packing variation and easy removal. A rigid product in a simple carton may need little clearance, while a fragile wrapped product or multi-piece gift set may need significantly more.
What does L × W × H mean for a custom box?
It means length × width × height. Length and width describe the base or face of the box, while height is usually the dimension from the base to the opening. Confirm the supplier’s convention, especially for styles with trays, sleeves or drawers.
Should I allow for cardboard thickness in my measurements?
If you are specifying internal box dimensions, the supplier normally accounts for material thickness when calculating the external dimensions and dieline. Confirm this explicitly, particularly where the finished external size must fit another pack or display system.
Do I need a sample for a simple rectangular product?
A sample is still worthwhile when fit, presentation, print placement or packing speed matters. It is particularly important for products with tight tolerances, inserts, delicate surfaces, multiple components or a premium gift-box presentation.
Measure the finished packed product, state your required internal dimensions, and validate the proposed size with a physical sample before committing to production. That process gives you a practical basis for specifying a made-to-measure box with confidence.
