
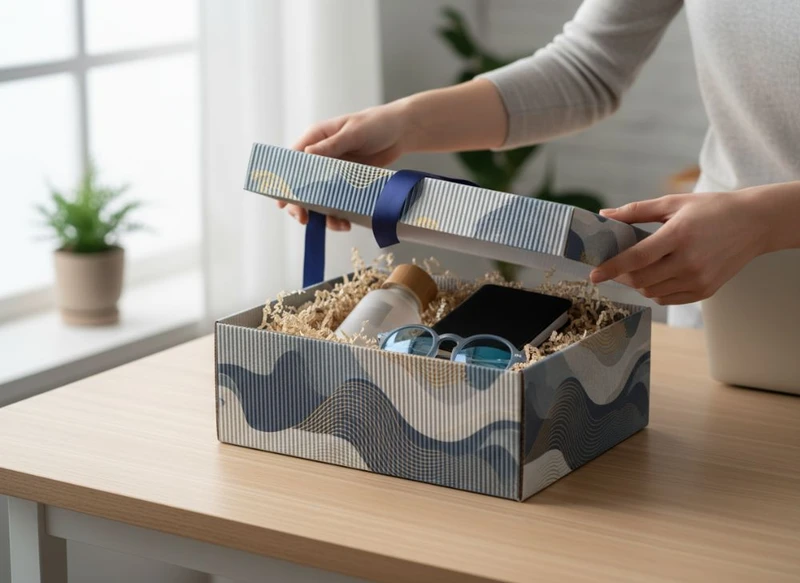
Custom packaging can support ecommerce sales when it makes the product easy to recognise, protects it in transit and creates an unboxing experience worth remembering. The strongest designs are not necessarily the most elaborate: they match the product, customer expectations, delivery journey and budget.
To design custom packaging that boosts your ecommerce sales, begin with the customer and the product’s shipping risks. Then select a practical box format, use brand elements consistently, test the packed parcel and measure whether the added packaging cost produces worthwhile commercial results.
Understanding Your Target Audience & Unboxing Expectations
Your packaging should feel appropriate for the item and the person receiving it. A premium skincare order, a subscription product and a large household item can all need different levels of presentation, protection and information.
Start by defining what the recipient needs from the delivery.
- Recognition: Can they identify the brand and product without searching through excessive print or inserts?
- Ease of opening: Can the parcel be opened without damaging the contents or requiring awkward tools?
- Protection: Will delicate, heavy or loose items stay secure through normal handling?
- Presentation: Does the packaging reflect the price point and positioning of the product?
- Disposal: Is it clear which parts can be reused, separated or recycled where suitable facilities exist?
- Useful information: Are instructions, care details, ingredients, variants or returns information easy to find?
A practical way to set the brief is to write one sentence describing the intended unboxing moment. For example: “The customer should receive a compact, protective carton that feels considered but creates minimal waste.” This helps prevent unnecessary layers, oversized boxes and decorative features that do not serve the customer.
Match the packaging level to the product
There are usually three packaging roles in ecommerce:
| Packaging layer | Main purpose | Typical design priority |
|---|---|---|
| Product packaging | Presents and contains the item | Shelf appeal, product information and brand recognition |
| Shipping packaging | Protects the order during dispatch and delivery | Strength, efficient dimensions and secure closure |
| Inner presentation | Improves organisation and perceived value | Controlled reveal, protection and clear product arrangement |
One box may perform all three roles for a robust product. For fragile, giftable or premium items, a product box inside a separate outer shipping carton may be more suitable. Avoid assuming every order needs a highly finished gift box; the right approach depends on product margin, breakage risk and customer expectations.
Integrating Label Sticker Design with Your Box
Labels and stickers are a flexible way to add product-specific information without redesigning an entire carton for every variation. They can be especially useful for short runs, seasonal collections, changing product variants and fulfilment workflows.
A well-designed label should support the box rather than compete with it. Keep the hierarchy simple: brand first, product name second, then essential details such as size, scent, colour, batch information or handling instructions where relevant.
Consider using custom stickers and labels for:
- Product variants that share one standard box size
- Tamper-evident seals, where appropriate for the product
- A branded closure on tissue paper or a plain mailer
- QR codes leading to setup, care or product-use information
- Limited-edition messages without holding multiple printed box designs
- Warehouse identification and stock organisation
Make labels work in production and fulfilment
Before approving artwork, confirm the practical details:
- Label position: Allow a flat, unobstructed application area. Avoid folds, seams, textured surfaces and box corners.
- Label size: Ensure it is large enough for critical text and codes to remain legible.
- Adhesive selection: Check suitability for the box surface, expected storage conditions and intended removal behaviour.
- Colour contrast: Do not place small dark text over busy artwork, metallic effects or weak contrast.
- Scanning needs: Test any barcode or QR code after printing and when applied to the final packaging.
- Application method: Decide whether labels will be applied by hand or as part of a packing process, as this affects size, placement and quantity planning.
If a label includes regulated product information, disposal statements or safety content, verify the current requirements that apply to your product and Australian market before printing.
Technical Specs: Sizing and Durability for Shipping
A box that is too large costs more to store, can require more void fill and allows products to move around. A box that is too tight may crush the product, make packing slow or frustrate customers when opening it.
The starting point is the packed product, not the product alone. Measure:
- Length, width and height of the item
- Any cap, handle, cable or uneven component
- Protective wrap, sleeve or insert
- Clearance needed for easy packing
- Void fill or cushioning required around fragile areas
- Multiple-item order configurations, if common
Use internal box dimensions for fit calculations. External dimensions will be larger because they include the material thickness and construction.
Select the right structural style
Common ecommerce choices include:
- Mailer boxes: Useful for lighter products and branded unboxing experiences. A self-locking design can reduce the need for extra tape when it is suitable for the packed weight and journey.
- Tuck-end cartons: Often used as retail-facing product boxes, sometimes placed inside a separate shipping carton.
- Corrugated shipping cartons: A practical option for heavier, larger or more fragile products.
- Rigid gift boxes: Suitable where presentation is central, though they may need protective outer packaging for dispatch.
- Die-cut inserts: Help keep products apart and oriented correctly, particularly where bottles, glass, accessories or multiple components are involved.
Explore custom box options with a clear brief that includes internal dimensions, product weight, packing sequence and intended shipping use. A box style that looks ideal in a flat artwork preview may not be the best option once assembled and packed.
Design for the full delivery journey
Durability is determined by more than board thickness. Box performance also depends on its dimensions, closure method, product weight distribution, moisture exposure, stacking conditions and the amount of empty space inside.
Check these points before finalising:
- The product cannot shift enough to collide with another item or the box walls.
- Heavy components sit low and are supported from underneath.
- Corners and edges have adequate protection if they are prone to damage.
- The closure remains secure after normal handling.
- Any internal insert fits the final product dimensions, including caps and protective sleeves.
- Print and labels remain readable after handling.
- The outer packaging does not reveal sensitive product details where discretion is important.
Do not rely on a material description alone to establish suitability. Assemble representative samples, pack the product as it will be dispatched, and inspect the result after realistic handling. If the product is fragile, unusually heavy or high value, consider more rigorous testing appropriate to the risk.
5 Common Paper Box Design Mistakes to Avoid
Paper-based packaging can be refined, versatile and straightforward to brand, but small design decisions can cause avoidable problems in production and fulfilment.
1. Designing only for the screen
Artwork may look balanced on a monitor but become crowded once it wraps around folds, closures and panels. Keep critical logos, text and graphics away from cut lines, creases and glue areas. Request a dieline and confirm which panels will be visible once the box is assembled.
2. Choosing a box before measuring the packed product
Selecting a standard size first can lead to excessive void space or an unworkably tight fit. Measure the final packed configuration, including protective materials and inserts, before locking in dimensions.
3. Overloading the design with finishes and messages
Foil, embossing, spot effects, internal printing and multiple inserts can all have a role. However, using every available feature can weaken the hierarchy and increase complexity. Choose one or two elements that reinforce the product’s positioning instead of making every surface compete for attention.
4. Ignoring the packing workflow
A design can be visually successful but slow to assemble. Consider how the box is folded, how inserts are placed, whether labels align reliably and whether the final closure is simple for the packing team. Ask for an assembled sample before committing to a large run.
5. Making unverified environmental claims
Terms such as “recyclable”, “compostable” and “plastic-free” can depend on the final material combination, coatings, adhesives, inks, local collection systems and how the consumer separates components. Describe materials accurately and verify any environmental claims before placing them on packaging.
Measuring the ROI of Premium Gift Packaging
Premium gift packaging may contribute to sales when it supports a higher-value product, gifting occasion, repeat purchase strategy or stronger brand distinction. It is not automatically the right choice for every ecommerce order.
Measure return on investment by comparing the added cost with changes that matter to your business. These may include average order value, gift-message uptake, repeat orders, damage-related contacts, customer feedback themes and the proportion of customers selecting a gift option.
Build a simple packaging comparison
Compare a standard option and a premium option using consistent assumptions.
| Assessment area | Standard packaging | Premium gift packaging |
|---|---|---|
| Direct packaging cost | Usually lower | Often higher due to materials, construction or finishing |
| Packing time | Often simpler | May require more assembly or components |
| Product protection | Depends on the structure chosen | May still need a protective shipper |
| Gift suitability | Functional presentation | Can create a more considered reveal |
| Brand expression | Usually focused on essentials | More opportunity for texture, detail and interior print |
| Commercial fit | Everyday and price-sensitive orders | Higher-margin, seasonal or gift-led orders |
Calculate the total packaging cost per dispatched order, not just the unit cost of the box. Include inserts, labels, tissue, outer protection, packing labour, storage space and any increased dimensional shipping cost where relevant.
A controlled trial can be more informative than assumptions. Offer premium packaging for a defined product group or gifting period, use the same product and pricing conditions where possible, then review order behaviour and operational impact. Avoid treating social comments or a few positive messages as proof of commercial return; look for a consistent pattern across relevant measures.
For products where presentation is part of the purchase decision, custom gift packaging can be assessed alongside the protective outer packaging required for ecommerce dispatch.
Sourcing Sustainable and Recyclable Materials
Sustainable packaging decisions should consider the complete system: material use, product protection, reuse potential, transport efficiency and end-of-life options. Reducing damage and avoiding unnecessarily large boxes can be as important as the material selected.
When sourcing paper or board packaging, ask suppliers to clarify:
- The board type and any recycled content claims
- Whether coatings, laminations or decorative elements affect recycling pathways
- The material used for inserts, windows, tapes and labels
- Whether components can be separated easily by the recipient
- The minimum practical board weight or strength for your product
- Whether a simpler construction can replace multiple materials
- What claims can be accurately made about the finished pack
Design for simpler disposal
Where appropriate, use a small number of compatible materials and make the disposal route intuitive. For example, an all-paper solution may be easier for customers to understand than a carton combined with permanently attached plastic, foam and mixed-material decoration.
That said, a paper-only approach is not always the best fit. Some products need barriers, protection or tamper features that require other materials. Choose based on product needs first, then reduce unnecessary components and communicate disposal guidance carefully. Local recycling acceptance can vary, so customers should check their local service’s instructions.
Tips for Mockups and Prototyping Your Design
Digital mockups are useful for reviewing hierarchy, colours and panel layout, but they cannot fully show how a packaging design performs. A physical prototype helps identify fit, opening, assembly and protection issues before full production.
Use this sequence:
- Review the dieline: Confirm dimensions, folds, glue flaps, cut-outs and the orientation of each panel.
- Create a visual mockup: Check placement of the logo, product name, key information and any label area.
- Make a plain structural sample: Pack the real product and assess clearances, closure and assembly.
- Review a printed sample: Examine legibility, colour appearance, finishes and alignment on the assembled box.
- Test the complete parcel: Include all components, outer packaging and normal packing materials.
- Collect operational feedback: Ask the people who pack, store and handle the box to flag friction points.
- Record approved specifications: Keep the dieline version, artwork file, materials, finishes and packing instructions together.
Allow for normal variation in paper-based materials and production processes. Fine type, tight registration around folds, large solid ink areas and intricate cut-outs may need special attention during proofing. If brand colour is critical, define how colour approval will be managed before production rather than relying solely on an on-screen display.
Final Checklist Before Sending to Print
Use this checklist to review your custom ecommerce packaging design.
- [ ] The box has been sized from the fully packed product, using internal dimensions.
- [ ] The chosen structure suits the product weight, fragility and intended delivery journey.
- [ ] All critical artwork sits clear of folds, cut lines, glue areas and closure points.
- [ ] The brand, product name and key customer information have a clear hierarchy.
- [ ] Labels have an approved size, placement, adhesive and application method.
- [ ] Any barcode or QR code has been tested at its final printed size.
- [ ] Materials, inserts and finishes are compatible with the product.
- [ ] The outer shipping solution protects premium or retail-facing product packaging.
- [ ] Environmental descriptions and disposal guidance have been verified for the finished pack.
- [ ] A physical sample has been assembled, packed and reviewed by relevant teams.
- [ ] Artwork, dielines, material choices and finishing instructions are version-controlled.
- [ ] Quantities, lead-time expectations, proofing requirements and commercial terms have been confirmed with the supplier.
Effective ecommerce packaging balances product protection, practical fulfilment and a recognisable customer experience. Once your brief is clear, use a physical prototype to validate the design before ordering. For supplier background when comparing packaging partners, see about XGolden Print.
