
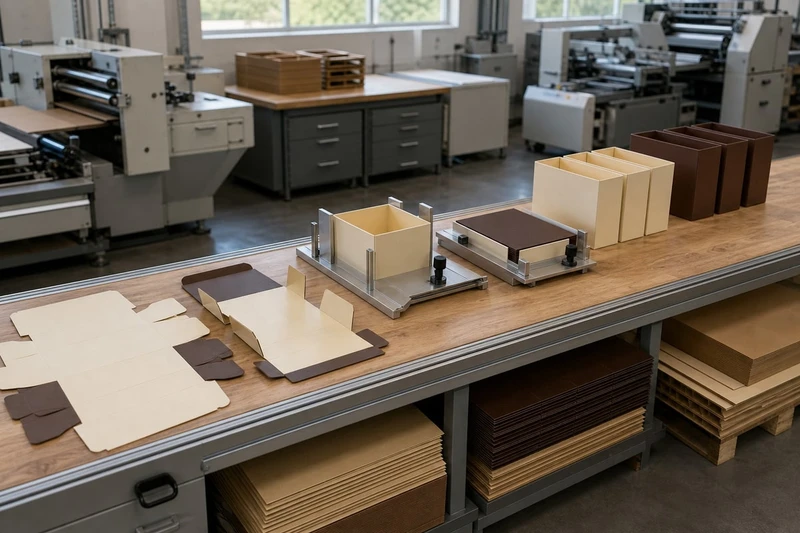
Efficient packaging assembly begins well before the packing bench. The best packaging design for assembly uses a simple packing sequence, as few separate parts as practical, and features that make the correct orientation obvious. When a box is easy to erect, fill, close and check, teams can pack more consistently with less rework.
For Australian brands, retailers and e-commerce operations, the goal is not simply to make a box quicker to assemble. It is to create a repeatable pack-out method that protects the product, presents it properly and remains workable when order volumes rise or staff change. Structure, inserts, closure style and written instructions must operate as one system.
Map the packing sequence
Start with the real steps a packer will take, not just the finished unboxing experience. List every action from receiving flat packaging through to the sealed carton or mailing satchel. This reveals where an attractive structural idea may add unnecessary handling.
A basic packing sequence commonly looks like this:
- Pick the flat box or sleeve.
- Erect or fold the pack.
- Place an insert, tray or divider if needed.
- Load the product and any accessories.
- Add printed collateral, such as a care card or thank-you note.
- Close, lock or seal the packaging.
- Check orientation, presentation and label placement.
- Place the completed item into an outer shipping pack where applicable.
For each step, ask four practical questions:
- Does the packer need two hands?
- Is there a decision to make, such as which panel faces up?
- Could the component be fitted incorrectly?
- Does the next step require setting the pack down, turning it or reaching for another item?
The more movements, choices and loose items involved, the greater the chance of slower pack-out and inconsistent presentation. This does not mean every package needs to be minimal. Premium gift packaging may justify additional assembly steps, but those steps should be deliberate and easy to repeat.
Design from the product outward
Use the actual product dimensions, weight, fragility and orientation to shape the sequence. A jar, bottle, electronics accessory or apparel item may all need different loading logic.
For example:
- Top-loading packs suit products that are placed vertically into a tray or carton and need visible presentation after opening.
- Side-loading cartons can be practical for folded garments, boxed accessories and products packed in a production line.
- Drawer-style boxes offer a refined reveal but involve at least two components and can be slower than a one-piece folding carton.
- Sleeves add branding and tamper evidence around an inner pack, but require accurate alignment during assembly.
Consider what arrives at the packing station. If goods arrive in a particular orientation or are picked from storage in a standard tote, designing the box to accept the product in that same orientation can remove a turn or transfer step.
Identify the slowest action first
One awkward step can dictate the speed of the whole pack-out process. Common bottlenecks include peeling liner from double-sided tape, fitting a tight insert, trying to align a sleeve, or searching for the correct leaflet.
Observe a small number of packs being assembled under realistic conditions. Time is useful, but look beyond average seconds per pack. Note where people hesitate, rotate the packaging, correct a panel or use extra force. Those are the actions worth redesigning.
A pack that takes slightly longer but produces a reliable, presentation-ready result may be preferable to a nominally faster design that regularly needs rework.
Reduce unnecessary components
Every separate component introduces a picking, handling and quality-check step. Reducing component count usually makes assembly easier, provided the remaining structure still gives the product enough protection and the intended presentation.
Review the pack as a bill of components:
- Outer carton or box
- Product insert or tray
- Divider
- Sleeve
- Tissue paper
- Ribbon, seal or sticker
- Printed card or booklet
- Tamper-evident label
- Protective void fill
- Outer transit packaging
Remove or combine items only where their function is genuinely covered elsewhere. For instance, a well-designed internal fitment may eliminate the need for loose tissue and excessive void fill. Conversely, removing an insert from a heavy or fragile product pack may make assembly quicker but increase product movement and damage risk.
Combine functions where possible
The most practical packaging designs often let one element perform two jobs:
- A self-locking carton can provide closure without a separate sticker or tape.
- A folded internal panel can hold the product in position without an extra insert.
- A printed internal panel can provide instructions or brand messaging without a loose card.
- A die-cut retention feature can stabilise an item while allowing the product to remain visible.
- A shipping-ready outer carton can reduce the need to place a retail box inside another box for some suitable products.
This approach should be tested carefully. Combining functions can make a design more efficient, but it can also create a more complex die-line or make the pack harder to recycle if incompatible materials are permanently joined.
Do not optimise away product protection
Assembly efficiency is only one design criterion. The package must still work through storage, handling and transport, particularly for e-commerce orders that may experience more handling than shelf-ready retail packs.
Before removing a component, check:
- Whether the product can move, scuff or collide with another item
- Whether corners, lids, glass, coatings or delicate finishes need support
- Whether packers can load the product without touching sensitive surfaces
- Whether the completed package remains stable in the chosen shipping format
- Whether a removed seal affects tamper evidence or retail requirements
A lean pack-out process should reduce non-value-adding steps, not shift costs into returns, damaged stock or customer complaints.
Choose practical closures and inserts
Closures and inserts are often where packaging design for assembly succeeds or fails. They need to be simple enough for repeated use while matching the product’s weight, use case, security needs and desired opening experience.
The right choice depends on how the box is packed, how often it is opened, whether the product will be shipped, and whether the packaging is intended for retail display, gifting or both.
| Feature | Assembly strengths | Watch-outs | Best suited to |
|---|---|---|---|
| Tuck-in flap | Quick, familiar and low component count | May open during transit if the fit is loose | Lightweight retail cartons |
| Auto-lock base | Fast base erection and good support | Can cost more than a basic tuck base; needs correct folding | Heavier items and higher-volume pack-out |
| Crash-lock base | Arrives largely pre-formed for fast erection | Bulkier in flat storage; ensure it suits the product weight | Products requiring rapid carton set-up |
| Peel-and-seal strip | Clear and secure closure | Liner removal creates waste and an extra action | Mailing boxes and one-time shipping packs |
| Self-locking tabs | No extra adhesive required | Tabs must be easy to engage without tearing | Presentation boxes and reusable packs |
| Magnetic closure | Premium opening experience | More components and alignment steps; material separation may matter | Selected gift and premium product boxes |
| Die-cut insert | Positions the item accurately | Tight tolerances can slow loading | Fragile, shaped or premium products |
| Folded board insert | Can ship flat and reduce loose parts | May need extra folding during assembly | Lightweight products with modest protection needs |
Select closures based on handling, not appearance alone
A closure may look polished in a sample but prove inconvenient during regular packing. For example, a tuck flap that is too tight can slow every closure, while one that is too loose may need an unplanned seal or sticker. Both situations weaken process consistency.
Confirm these points during sampling:
- Can the closure be completed without tools?
- Can it be closed while the pack is supported on a bench?
- Does it hold securely once closed?
- Is a seal needed for transit, tamper evidence or branding?
- Can the pack be reopened without looking damaged, if that is important?
- Is the closure still practical for staff wearing gloves, where relevant?
Make inserts forgiving
An insert should guide the product into position, not require precision wrestling. Tight-fitting cavities may look impressive but become difficult if product dimensions vary slightly, labels are thicker than expected, or the packer needs to load quickly.
Build in sensible tolerance based on the real product, not an idealised drawing. Trial products should include ordinary production variation, such as filled versus empty containers where weight changes handling, products with labels applied, and units with their normal accessories attached.
If an insert is required primarily for visual presentation, consider whether a folded platform, simple cradle or printed backing card can create the same effect with fewer handling steps.
For projects needing more considered presentation features, explore custom gift packaging with the assembly sequence specified as part of the brief.
Design clear orientation and access
Packers should be able to tell immediately which way is up, where the product sits and how the box closes. Clear orientation reduces errors such as upside-down branding, backwards labels, hidden instructions and products facing the wrong direction.
Good orientation cues can be structural, visual or both.
Use structural cues first
Physical features are often more reliable than small printed marks. Consider:
- An asymmetrical insert that accepts the product in only one direction
- A thumb cut-out indicating the opening side
- A shaped cavity that locates a bottle, jar or accessory
- A flap layout that naturally guides the closing order
- An opening that makes top and bottom visually distinct
- A base construction that prevents the box being erected incorrectly
Where a pack can be assembled in more than one way, simplify the structure before adding more printed instructions. Preventing an error is generally better than asking a packer to notice it.
Add visible visual cues
Printed symbols and short text are useful where structural cues alone are not enough. Keep them direct and place them where the action happens:
- “Open here” beside a tear strip or tab
- “Front” on an internal tray where product facing matters
- A small arrow showing the loading direction
- A highlighted area identifying where a card or accessory belongs
- A simple diagram inside the carton for multi-part kits
Avoid relying on tiny instructions placed on an outer flap that disappears once the carton is erected. Also avoid using only colour to communicate orientation, as lighting, print variation and colour vision differences can make it less clear.
Allow access for hands and tools
A product can be well retained yet difficult to load or remove. Consider the clearance needed for fingers, particularly when packers must place products without marking them. Narrow gaps around glossy, delicate or tightly fitted items can cause delays and accidental scuffs.
Check whether the packer can:
- Grip the product safely during loading
- Place accessories without dislodging the main item
- Reach closure tabs without crushing the carton
- Remove protective liners or seals cleanly
- Inspect the final product presentation before closure
This is especially important for compact premium packs, where the desire for a close fit can conflict with practical access.
Trial assembly with representative products
A packaging sample is not fully validated until it has been assembled repeatedly with representative products and the intended packing materials. A single careful desk assembly may not expose problems that arise during a normal shift.
Trial the pack using the actual or closest available versions of:
- Product units, including expected dimensional variation
- Labels, caps, lids, chargers, cables or accessories
- Inserts, cards, seals and other loose components
- Outer mailers, void fill or transit cartons
- Relevant packing tools, such as tape dispensers or label applicators
Run the trial in the intended order. Do not skip steps or have the designer assemble the pack using knowledge that a new staff member will not have.
What to assess during an assembly trial
Record more than assembly time. A useful trial assesses consistency, ergonomics and error potential.
| Assessment area | Questions to ask |
|---|---|
| Erection | Does the box pop open easily? Are folds intuitive and stable? |
| Loading | Can the product be inserted without force, scratching or excessive adjustment? |
| Orientation | Is it obvious how the product, insert and printed components should face? |
| Closure | Can the box be closed reliably without extra tape, pressure or rework? |
| Presentation | Does every completed pack look consistent from the customer-facing side? |
| Transit readiness | Does the packed product remain stable in its intended outer shipping solution? |
| Ergonomics | Are repetitive movements, sharp edges or awkward grips creating strain? |
| Error recovery | If a packer makes a mistake, can it be corrected without wasting the box? |
Include both experienced and less experienced participants if possible. Experienced packers often develop informal workarounds that hide weaknesses in the design. A new person is more likely to reveal whether the process is self-explanatory.
Test at realistic pace
A trial does not need a full production run to be valuable. Even a modest batch can reveal repeatability issues when several people complete the same task in succession.
Look for variation between completed packs. If one person consistently gets a neater result than another, identify why. The cause may be unclear folding order, inconsistent adhesive placement, an insert that shifts, or product orientation that depends on judgement.
Where the product is seasonal, handmade or subject to batch variation, repeat the trial when a representative production unit is available. Packaging that works around a prototype may not suit final stock.
Document the approved pack-out method
Once the structure has been trialled and approved, document the exact method. This converts a good design into a repeatable operational process.
The pack-out document should be concise enough to use at the packing bench. A long manual may be necessary for internal quality systems, but a clear one-page work instruction is often more practical for daily assembly.
Include:
- The approved box, insert and accessory versions
- A component list with quantities
- The packing sequence in numbered steps
- Photos or diagrams showing product orientation
- The correct fold and closure order
- Placement of labels, cards, seals or protective materials
- A completed-pack visual reference
- Key quality checks before dispatch
- Instructions for handling damaged, incorrect or incomplete components
Control revisions carefully
Packaging often changes in small ways: a product gains an accessory, a label is resized, an insert is revised, or a promotional card is added. Any of these can affect assembly.
Use version identifiers for packaging artwork, die-lines and work instructions. When a change is approved, review the entire pack-out sequence rather than assuming it affects only one component. A new card, for example, may stop a lid from closing cleanly or create an unplanned extra picking step.
Keep a sample of the approved completed pack where practical. It gives staff a quick visual standard for orientation, fullness and finish.
Common pack-out documentation mistakes
Avoid these frequent issues:
- Writing instructions before the final packaging trial
- Showing only idealised renders rather than real assembled photos
- Omitting the location of loose components
- Failing to specify closure order
- Leaving quality checks vague, such as “check presentation”
- Not updating instructions after packaging or product changes
- Storing instructions where temporary, seasonal or agency staff cannot access them
A better quality check is specific: “Product label faces front panel; insert sits flat; both tuck tabs are engaged; no loose accessory is visible.”
Choosing the right level of assembly efficiency
Not every product needs the same packaging solution. The right balance depends on order volume, labour model, product value, presentation expectations and shipping conditions.
A simple one-piece folding carton may be the best option for fast, high-volume retail packing. A multi-part rigid gift box may be justified for a premium launch or corporate gifting programme where presentation matters more than seconds per unit. In either case, the design should make the intended process predictable.
When comparing custom boxes or reviewing a packaging brief, provide these operational details alongside size, material and artwork:
- Whether packaging is assembled manually, semi-automatically or by another process
- Expected pack-out volume and peak periods
- Product dimensions, weight and handling requirements
- Number of product variants and accessories
- Required retail, gifting or e-commerce presentation
- Outer shipping method and need for tamper evidence
- Who will perform the packing and their available workspace
- Any current assembly problems you need the new design to solve
This information helps prevent a packaging format being chosen solely from a visual sample without considering daily use.
FAQ
What packaging style is fastest to assemble?
There is no universal fastest style, but one-piece cartons with intuitive folds, an easy closure and no separate insert are often efficient for manual pack-out. The best choice still depends on product weight, protection needs and whether the pack must withstand shipping.
Are inserts always necessary?
No. Inserts are useful when they stabilise, protect, separate or present products. If an insert does not serve a clear purpose, it may add cost, storage demand and assembly time. Consider folded board features or an adjusted carton size before adding a separate insert.
How can packaging reduce packing errors?
Use a structure that physically guides correct placement, add visible orientation cues, minimise loose components and document a simple packing sequence with photographs. Trialling the pack with new users is particularly helpful for finding avoidable errors.
Should packaging be designed differently for e-commerce?
Often, yes. E-commerce packaging must work through picking, packing and transit as well as customer opening. Confirm how the retail or gift pack fits into the outer shipping format, whether it moves during transit, and whether extra sealing or protection is needed.
When should we re-test packaging assembly?
Re-test whenever the product, accessory set, label, insert, closure, shipping method or pack-out team changes in a way that could affect fit or sequence. Small changes can create unexpected assembly issues.
Efficient pack-out is designed, trialled and documented rather than left to individual technique. Start by mapping the current process, remove steps that do not protect or improve presentation, and test the revised packaging with real products before committing to production. XGolden Print can then use a clear pack-out brief to help shape custom packaging that is practical for day-to-day assembly.
