
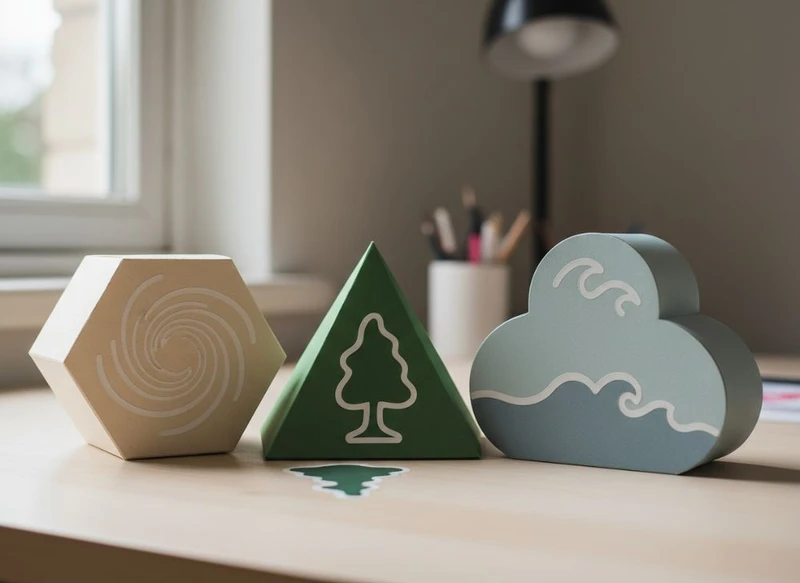
Die-cut paper boxes and stickers let a product’s packaging do more than contain or label an item. A shaped opening, curved carton, custom hanging tab or contour-cut label can reinforce product positioning, improve shelf recognition and create a more considered unboxing experience.
The best result is not necessarily the most complicated shape. Effective die-cut packaging balances visual distinction with product protection, packing efficiency, material use and straightforward assembly. This guide explains where non-rectangular shapes add value and how to specify them without avoidable production issues.
The Impact of Non-Traditional Box Structures
A rectangular carton remains a practical choice for many products because it stacks, stores and ships efficiently. However, a die-cut structure can be appropriate when the pack needs to reveal, hold, present or organise a product in a specific way.
Non-traditional structures can include:
- Curved or tapered cartons
- Boxes with shaped top closures
- Window cut-outs that reveal the product
- Handle cut-outs for carry packs
- Sleeve-and-tray designs
- Hexagonal, pillow or triangular forms
- Display-ready cartons with fold-out panels
- Product-hugging inserts or internal dividers
- Hang tabs and retail display cut-outs
The main commercial benefit is distinction. A recognisable silhouette can make a product easier to identify when it is displayed alongside conventional rectangular packs. Shape can also communicate the product category before a buyer reads the copy: a wedge-shaped carton may suit a snack format, while a slim folded sleeve can make a gift item feel more deliberate.
That said, an unusual outline should have a job to do. If it makes the box difficult to fill, weakens a key panel or wastes significant board area, the visual gain may not justify the trade-off.
When a custom structure is worth considering
Die-cut box shapes are generally most useful where one or more of the following applies:
- The product has an awkward, delicate or distinctive form.
- The pack needs a window, handle, hanger or opening feature.
- A giftable presentation is central to the product.
- The packaging must support a display or sampling format.
- The label needs to follow a curved container or illustrated outline.
- Brand recognition depends heavily on visual presentation.
For simpler products, visual differentiation may be achieved more efficiently through print, substrate choice, finishing or a well-designed label on a standard carton. Start with the product and sales environment rather than treating shape as decoration alone.
Cost Considerations for Custom Die-Cutting
Custom die-cutting involves more than choosing an outline. Cost can vary according to the complexity of the die-line, stock type, number of folds, finishing requirements, order volume and how efficiently the shape fits on the printed sheet.
A custom shape may introduce a tooling cost, especially where a dedicated cutting form is required. This is often a fixed setup component, so it can have a greater effect on small runs than on larger production quantities. Ask the printer which components are one-off, repeatable or likely to change if the artwork or dimensions are revised.
| Cost driver | Why it affects the job | Practical way to manage it |
|---|---|---|
| Die-line complexity | More intricate cuts, folds and small details can be harder to produce consistently. | Simplify tiny notches, narrow bridges and unnecessary contours. |
| Pack dimensions | Larger boxes use more board and may reduce the number of units per sheet. | Size the pack around the product with sensible clearance, not excess empty space. |
| Material choice | Board weight, coating and specialty stocks affect both price and fold behaviour. | Select a stock suited to the product’s weight and intended finish. |
| Print and finishing | Foil, embossing, spot treatments and multiple print areas add production stages. | Focus premium finishes on panels customers see and touch most. |
| Quantity | Setup and tooling are distributed across the run. | Compare several realistic quantities, including expected reorders. |
| Assembly requirements | Complex folds or multiple components can increase packing labour. | Use self-locating tabs and clear folding logic where possible. |
| Sheet nesting | Inefficient layouts create more offcuts. | Review nesting early, before the form is locked in. |
It is also important to consider the total packaging system. A complex box that needs an extra outer carton, more void fill or manual assembly may cost more in use than a slightly simpler structure that packs efficiently.
Before approving a quote, clarify:
- Whether tooling is included and whether it can be reused for repeat work.
- Which material, thickness and finish are being priced.
- Whether the quoted box is supplied flat or assembled.
- Whether inserts, windows, adhesive elements or labels are separate components.
- What artwork amendments can affect the price.
- Whether a physical sample or structural mock-up is available before a full run.
Avoid assuming that a small change is minor. Moving a crease, changing a window shape or altering a tab can require a revised die-line and may affect the sheet layout.
Designing Product-Specific Paper Box Shapes
The strongest die-cut paper box shapes are designed around real product dimensions and handling requirements. Begin with the object, then build out the packaging rather than starting with a decorative outline.
Measure the product in the form it will be packed. Include caps, lids, protrusions, protective wraps, accessories and any insert. If products vary slightly, design for the practical upper range rather than the idealised average.
Key structural questions to answer
Before design begins, decide:
- How will the product be inserted?
Top loading, side loading and tray loading each influence the closure and internal layout.
- What must the box protect against?
Consider compression, abrasion, movement, bending and contact between multiple items. The appropriate level of protection depends on the product and its journey through storage, handling and delivery.
- How will the customer open it?
A tuck flap is familiar and reusable. A tear strip can create a more controlled opening. A sleeve may feel premium but needs a secure fit.
- Will it sit, hang or stack?
Retail display requirements affect the base shape, front panel, hanger placement and visible product information.
- Does the product need to be seen?
A die-cut window can show colour, texture or contents. Ensure the opening does not weaken the carton or expose the product to unsuitable conditions.
- Will the pack be filled manually or as part of a repeatable process?
Complicated structures may be suitable for a small gift range but not for a high-volume product that must be packed quickly.
Match the structure to the product category
A few general pairings illustrate the principle:
- Small cosmetics or accessories: sleeves, drawer boxes, shaped windows and inserts can hold small items in place.
- Food-adjacent gift items: consider easy-open tabs, secure closures and clear zones for any required product information. Confirm suitability of all materials and finishes for the intended use.
- Apparel and soft goods: flat-fold cartons, wrap sleeves and belly bands minimise bulk while allowing a strong printed presentation.
- Fragile goods: prioritise internal retention, board strength and protective secondary packaging over elaborate external contours.
- Subscription or e-commerce packs: use shapes that are straightforward to assemble and leave room for return, care or product information where required.
For inspiration and structural options, explore custom printed boxes as a starting point, then develop a die-line around the actual item rather than a generic template.
Keep branding clear on shaped panels
A custom outline can reduce the amount of uninterrupted print area. Protect the key communication panels: the brand mark, product name, variant, opening instructions and any mandatory information relevant to your product category.
Do not place essential copy across a fold, too close to a cut edge, or inside an area likely to be obscured by a flap. A structural proof helps identify these issues before production.
Using Kiss-Cut Stickers for Unique Shapes
Kiss-cut stickers are a flexible way to introduce custom shapes without changing the primary packaging structure. In kiss-cut production, the sticker face material is cut to shape while the backing sheet remains intact. The surrounding backing can provide a larger, easy-to-handle border around a detailed sticker.
This differs from a die-cut sticker, where both the sticker and backing are cut to the outer shape. The right option depends on how the stickers will be supplied, applied and presented.
| Option | Best suited to | Main consideration |
|---|---|---|
| Kiss-cut sticker | Detailed outlines, small stickers, sticker sheets and branded giveaways | The backing remains larger than the sticker shape. |
| Die-cut sticker | Individual labels or decals with a shaped backing | The whole piece follows the contour. |
| Standard rectangular label | Fast, simple application on flat panels | It may offer less visual distinction. |
| Wrap label | Bottles, jars and other curved containers | Confirm the overlap, seam location and container dimensions. |
Kiss-cut labels work well for irregular illustrations, logos, product icons and seasonal designs. They can also be useful on a sticker sheet containing several related shapes, such as flavour icons, care symbols or branded seals.
For packaging, a shaped sticker can become a closure seal, tamper-evident element, product variant marker or short-run campaign layer. It is particularly useful when the core box is standard but the product range needs frequent artwork changes.
When specifying shaped stickers, check:
- The surface they will adhere to, such as coated board, uncoated paper, glass or plastic.
- Whether the product will encounter moisture, friction, temperature changes or oils.
- The smallest detail in the artwork; very fine points and narrow lines may be less robust.
- Whether the sticker needs to be removed cleanly or remain permanently applied.
- The application method: hand application and automated application can require different label formats.
Browse custom sticker options when comparing contour labels with conventional label shapes.
Maximising Material Use with Efficient Nesting
Nesting is the arrangement of box or sticker shapes on a printed sheet before cutting. Good nesting reduces unnecessary offcuts and can make a meaningful difference to material use and cost.
A die-line that looks efficient on screen may not nest well in production. Curves, protruding tabs, uneven edges and large windows can leave areas of unusable board between units. This does not mean unusual shapes should be avoided; it means the structural design should be reviewed alongside the sheet layout.
Design choices that support efficient nesting
- Keep opposing edges compatible where possible.
- Avoid large, isolated protrusions that prevent close placement.
- Use a repeated curve or angle where it supports the pack concept.
- Question decorative cut-outs that do not add a functional or brand benefit.
- Consider whether a separate insert can be designed to nest efficiently with the outer carton.
- Maintain enough space for cut tolerance, folds and print registration.
A designer may be able to adjust a contour by a few millimetres without changing the perceived shape. Small refinements can improve how many units fit on a sheet, especially for repeat orders.
Material efficiency should be balanced with the needs of the pack. An overly tight layout that compromises fold performance, cut accuracy or artwork placement is not a useful saving. Ask for a structural review when choosing between two similar concepts.
Pop-Up and Interactive Box Features
Pop-up and interactive features can turn packaging into part of the product experience. Examples include reveal panels, pull tabs, fold-out scenes, lift-the-flap messages, layered inserts and cartons that convert into a display.
These features are most effective when they support a specific purpose:
- Guide a customer through opening or setup.
- Present a gift or limited-edition item.
- Explain product components in a memorable format.
- Reveal a message, offer or collectible graphic.
- Create a simple display after the pack is opened.
An interactive detail should still leave the packaging easy to understand. If customers cannot identify where to open the box, or if a feature tears during normal handling, the design works against the experience it intended to create.
Practical limits of interactive structures
Every additional fold, tab or interlocking feature increases the potential for variation in assembly and use. Designs with narrow moving parts may be more vulnerable to damage, especially if the packaging is packed tightly or handled frequently.
Keep these principles in mind:
- Make the opening point obvious.
- Use clear visual cues where a panel pulls, lifts or folds.
- Avoid relying on fragile bridges or very small tabs.
- Ensure the closed carton remains secure.
- Test the interaction with the finished stock, not only a digital model.
- Confirm whether the structure must be assembled before the product is packed.
For a gift-focused presentation, custom gift packaging can provide a useful reference point for choosing between a simple premium structure and a more elaborate reveal.
How to Prepare Complex Die-Lines for Your Printer
A clean die-line reduces ambiguity between the designer, packaging buyer and printer. It should communicate cutting, folding, glue areas and artwork boundaries clearly, while keeping production marks separate from the finished design.
Your printer may supply a preferred template or die-line. Use it where available rather than rebuilding the structure from a visual reference.
Essential die-line elements
A production-ready file commonly separates the following onto clearly named layers or spot-colour swatches:
- Cut lines: outer perimeter, windows and internal cut-outs.
- Crease or fold lines: where the board is intended to fold.
- Perforation lines: where a controlled tear is required.
- Glue areas: panels that must remain free of important print elements or finishes.
- Bleed: artwork extending beyond the cut edge to avoid unwanted unprinted slivers.
- Safe area: the zone where essential text and logos should sit clear of cuts and folds.
- Artwork layer: the final printed design, kept distinct from production guides.
Confirm the printer’s preferred file format, colour settings, minimum line widths, text handling and requirements for linked images. Requirements vary by job, substrate and production method, so do not assume a previous project’s settings will apply unchanged.
A preflight checklist for complex packaging
Before sending artwork, review the following:
- Product dimensions match the current sample or specification.
- The structure can close without obscuring key text.
- Barcodes, ingredients, directions, warnings and other product information have sufficient clear space where applicable.
- Images and backgrounds extend into the bleed area.
- Critical elements sit within the safe area.
- Window cut-outs reveal the intended part of the product.
- Glue tabs do not contain important copy, foil or interactive details.
- Fold lines do not run through small type or fine logo features.
- A 3D mock-up has been checked for panel orientation and reading order.
- Any local product, labelling, environmental or safety requirements relevant to the item have been independently verified.
A physical prototype is particularly valuable for unusual structures. It allows you to check product fit, opening sequence, panel alignment and shelf presentation before committing to a production quantity.
Examples of Creative Box and Label Pairings
Combining a considered carton with a complementary sticker can create a cohesive system without making every component complex.
Shaped sleeve with a kiss-cut seal
A simple product box can be wrapped in a printed sleeve with a curved die-cut edge. A kiss-cut seal over the opening adds a tactile final detail and can carry a variant name, campaign message or opening instruction.
Best for: small gifts, seasonal ranges and products needing a visible closure. Check: the seal’s adhesive compatibility with the sleeve surface and whether it needs to tear on opening.
Window carton with a contour ingredient label
A carton window lets the product provide visual interest, while a contour-cut label adds colour coding or key product information without crowding the front panel.
Best for: products where appearance, texture or colour contributes to purchase confidence. Check: that the window and label do not compete for the same visual space.
Drawer box with a shaped internal insert
A drawer box can be paired with an insert cut to retain the product. A small branded sticker can seal tissue or provide a simple instruction on first use.
Best for: premium accessories, sets and presentation-led products. Check: that the insert holds the product securely without making removal difficult.
Standard carton with short-run shaped stickers
Rather than producing multiple printed carton versions, use a shared box design and apply different shaped stickers for product variants, limited editions or smaller release quantities.
Best for: evolving ranges and testing new product presentations. Check: colour consistency and label placement across packers or retail teams.
Fold-out carton with matching icon stickers
A fold-out pack can use printed panels to explain contents, with matching icon stickers used on accessories, refill packs or display materials.
Best for: multi-part sets and products needing simple visual guidance. Check: that icon meanings remain clear at the final sticker size.
Choosing the Right Level of Complexity
Use custom die-cut paper box and sticker shapes when the form improves presentation, fit, opening, display or recognition. Keep the design conventional when efficient packing, simple assembly and compact storage are the stronger priorities.
A practical specification process is:
- Define what the structure must achieve.
- Measure and test with the actual product.
- Choose the simplest form that meets that need.
- Review the die-line, nesting and assembly implications.
- Prototype the finished structure and artwork.
- Confirm material, finish and compliance requirements for the intended market and use.
- Finalise artwork only after the structural design is approved.
When you are ready to compare concepts, XGolden Print can be considered for custom packaging solutions. Bring product dimensions, intended quantity, artwork requirements and any preferred box or label references so the structure can be assessed on practical as well as visual grounds.
